Indexing OP Bridge Deposits
This tutorial will guide you through the process of indexing the Optimism Standard Bridge contracts on Optimism and Ethereum Mainnet in less than 5 minutes using the Envio HyperIndex no-code contract import feature.
The Optimism Standard Bridge allows users to easily move ETH and most ERC-20 tokens between Ethereum and Optimism Mainnet. The goal is to index bridge deposit events by extracting the DepositFinalized (index_topic_1 address l1Token, index_topic_2 address l2Token, index_topic_3 address from, address to, uint256 amount, bytes extraData) logs emitted by the contracts.
Prerequisites
Before we start indexing, you'll need to make sure you have the prerequisites installed.
Initializing an Indexer
Now that you have installed the prerequisite packages required, let’s jump into the practical steps of setting up the indexer.
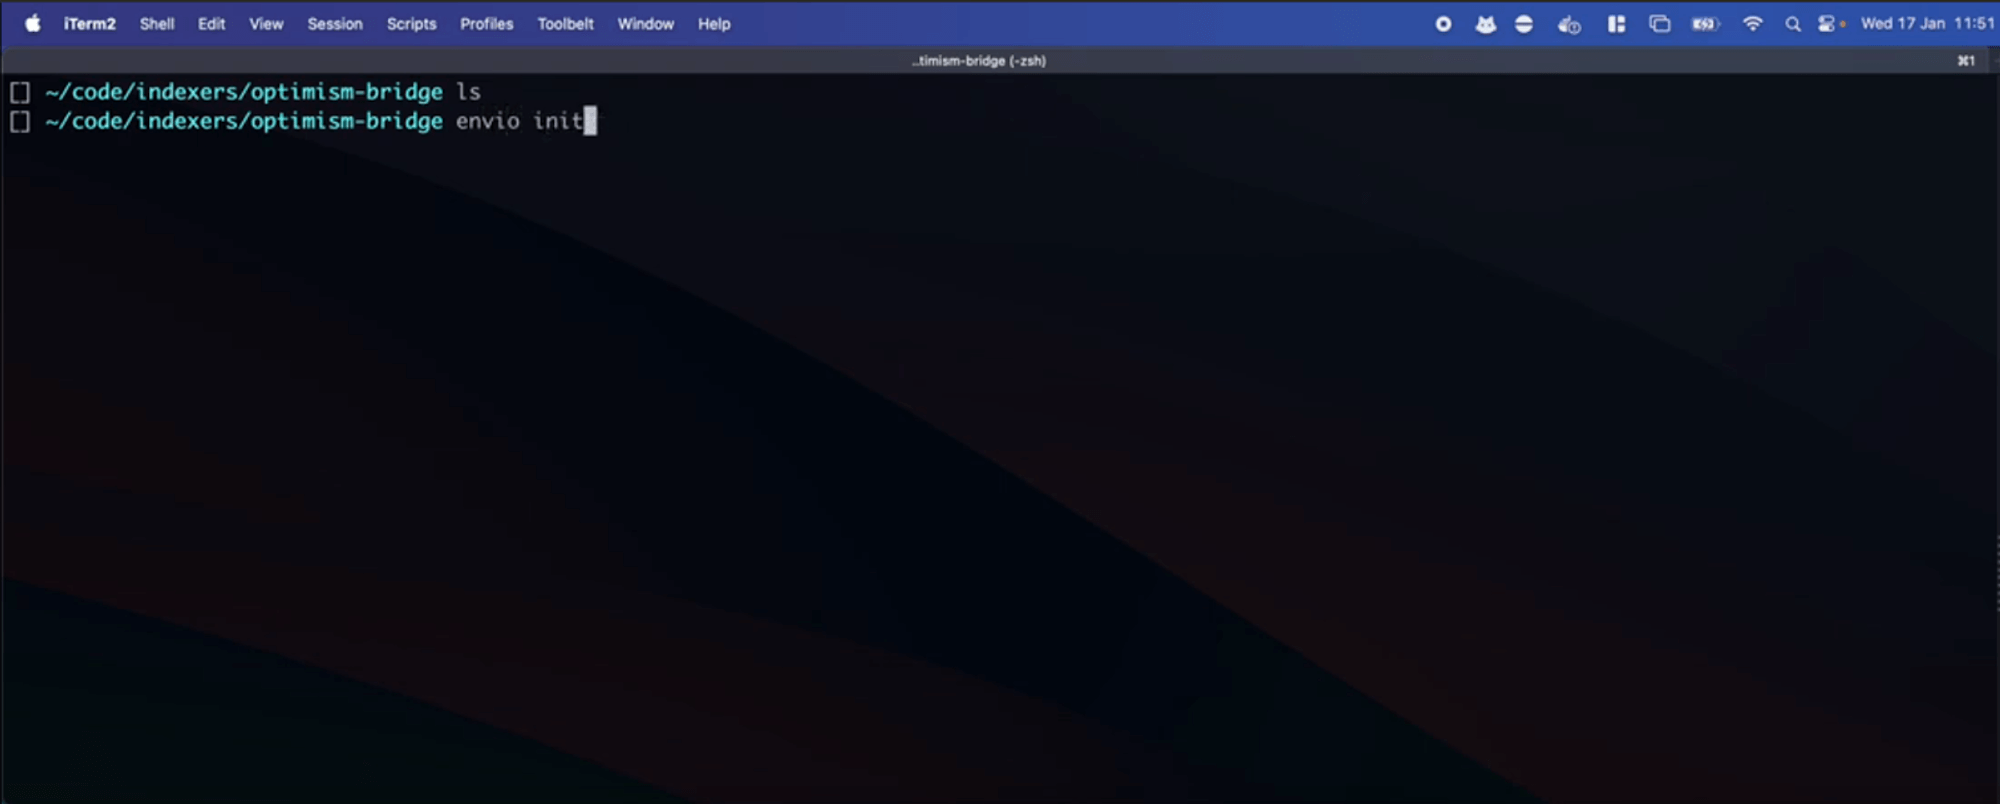
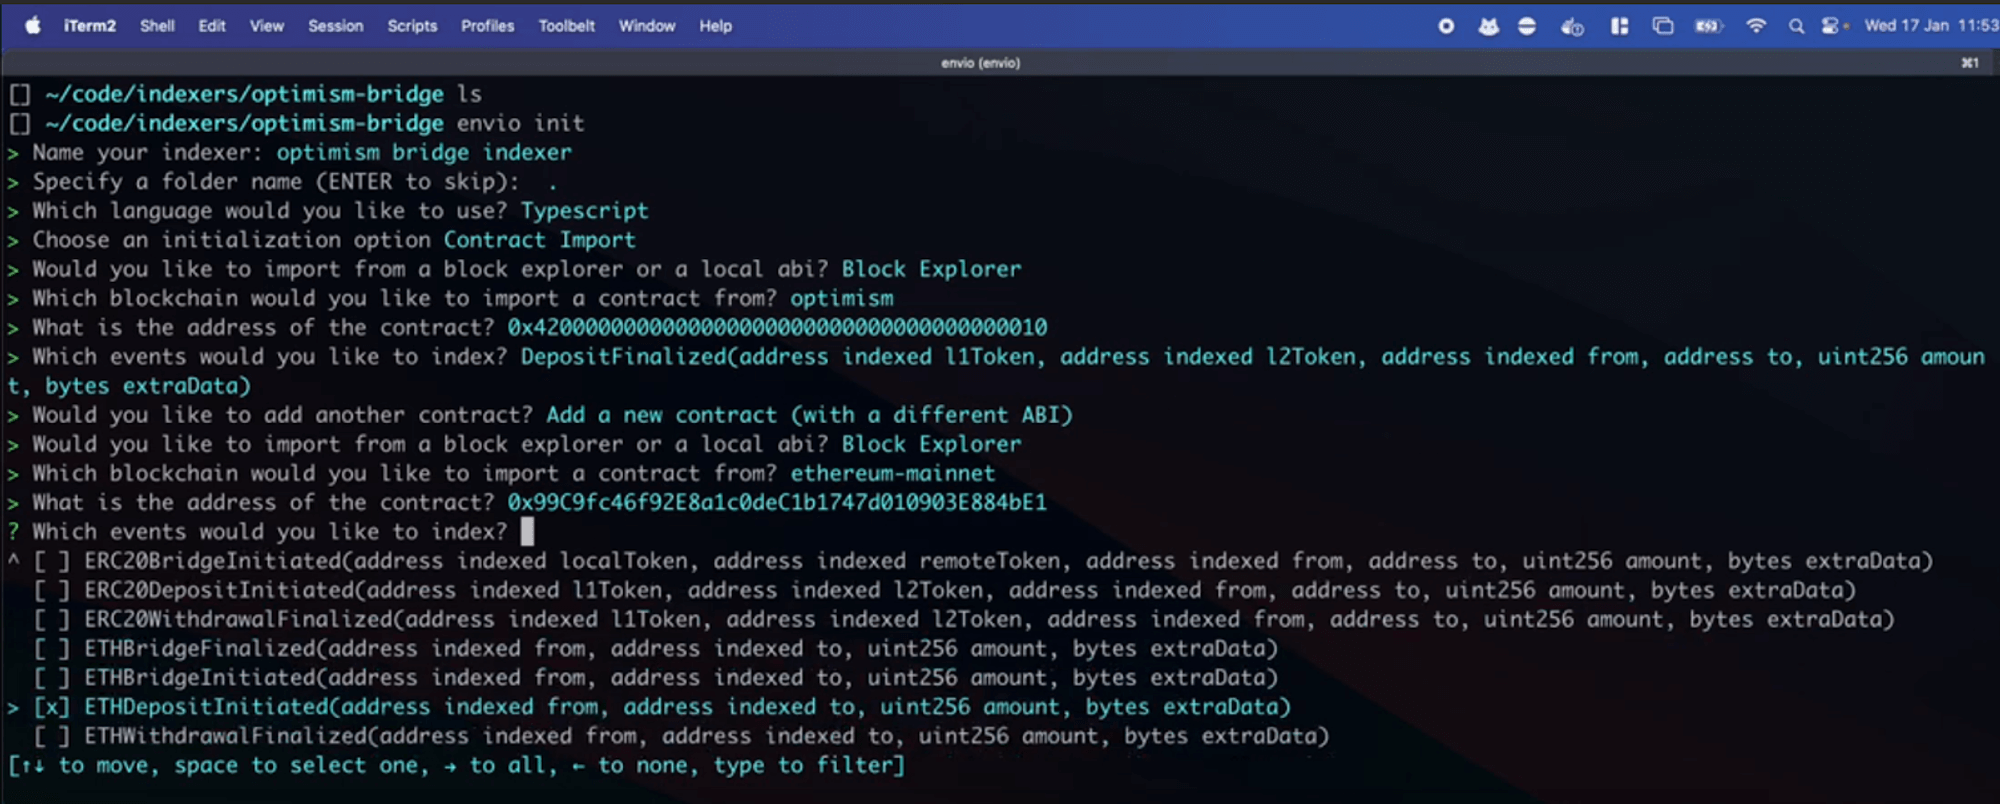
- Open your terminal in an empty repository and initialize a new indexer by running the command ‘envio init’
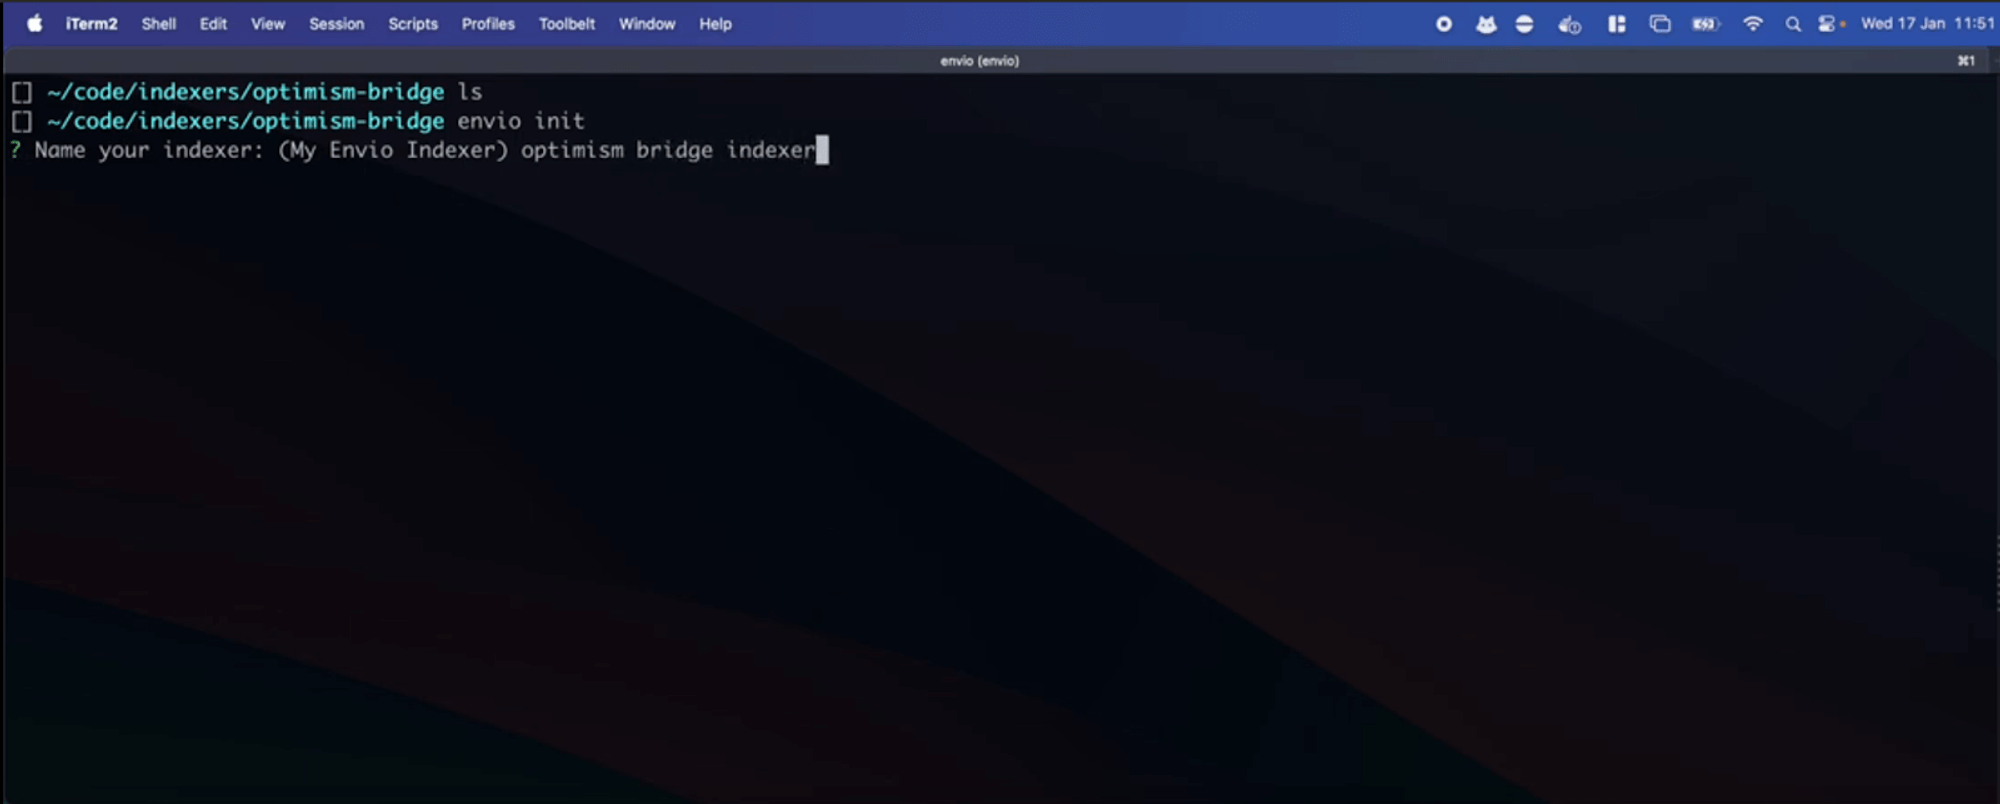
- Name your indexer. In this example, we named our indexer “optimism-bridge-indexer” but feel free to name your indexer anything you prefer.
- Choose a language, select contract import, and import from the block explorer. For this demonstration, we’ve chosen to use TypeScript as the language.
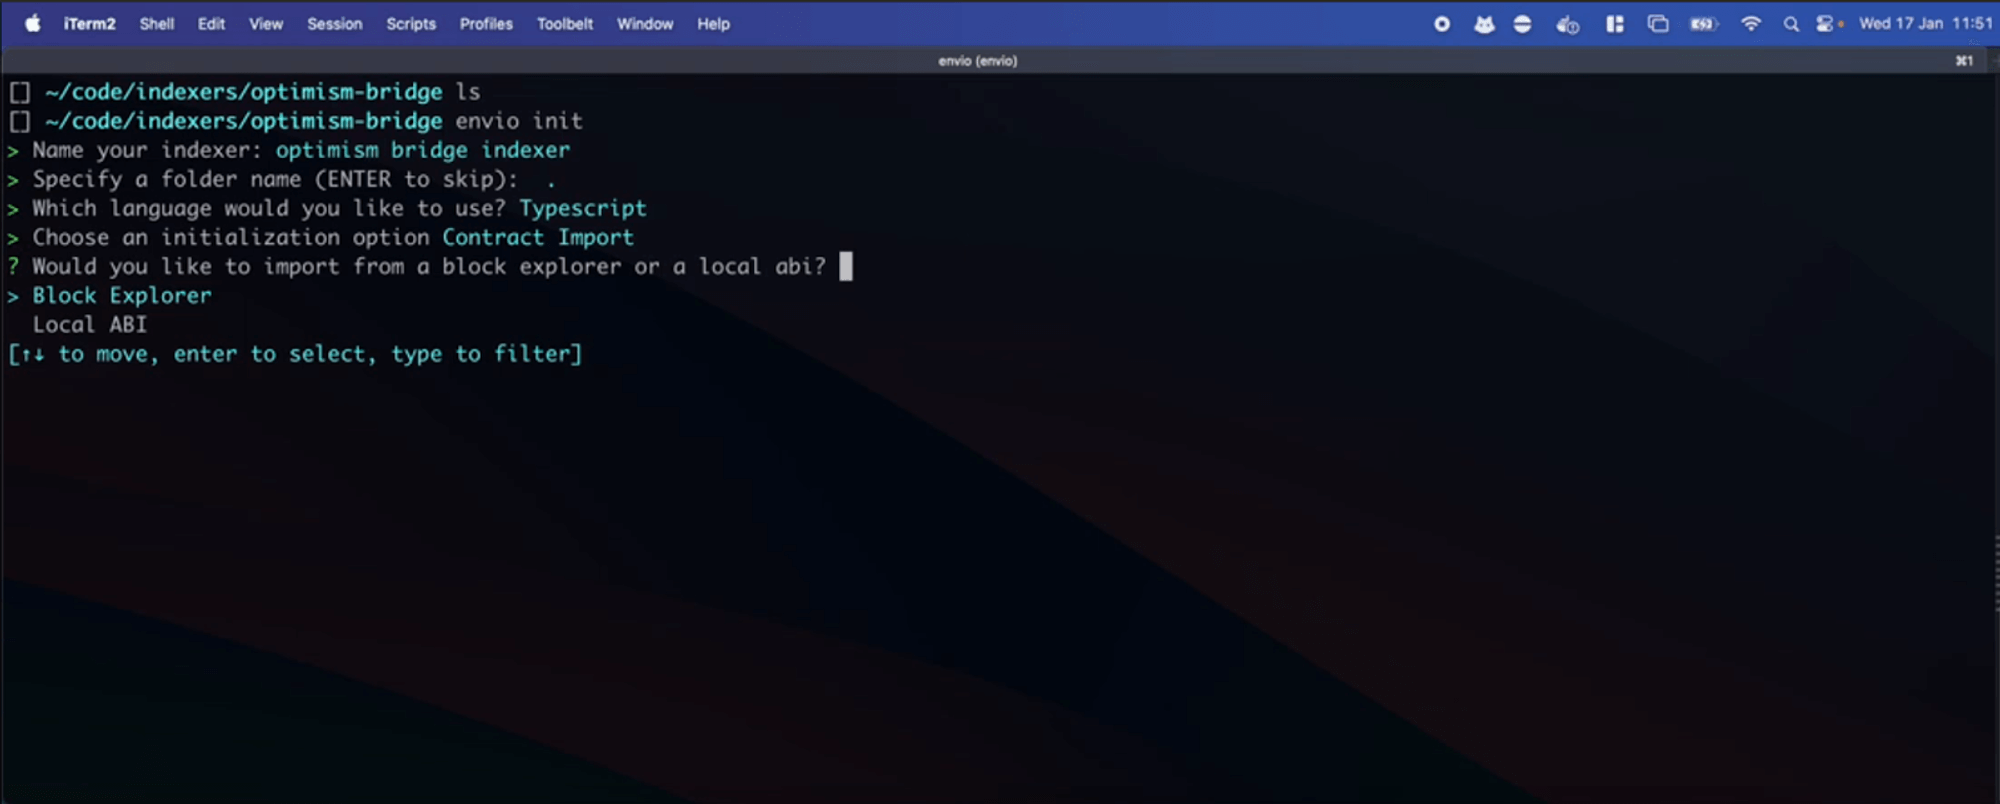
Note: Indexers on Envio can be written in JavaScript, TypeScript, or ReScript.
- Choose
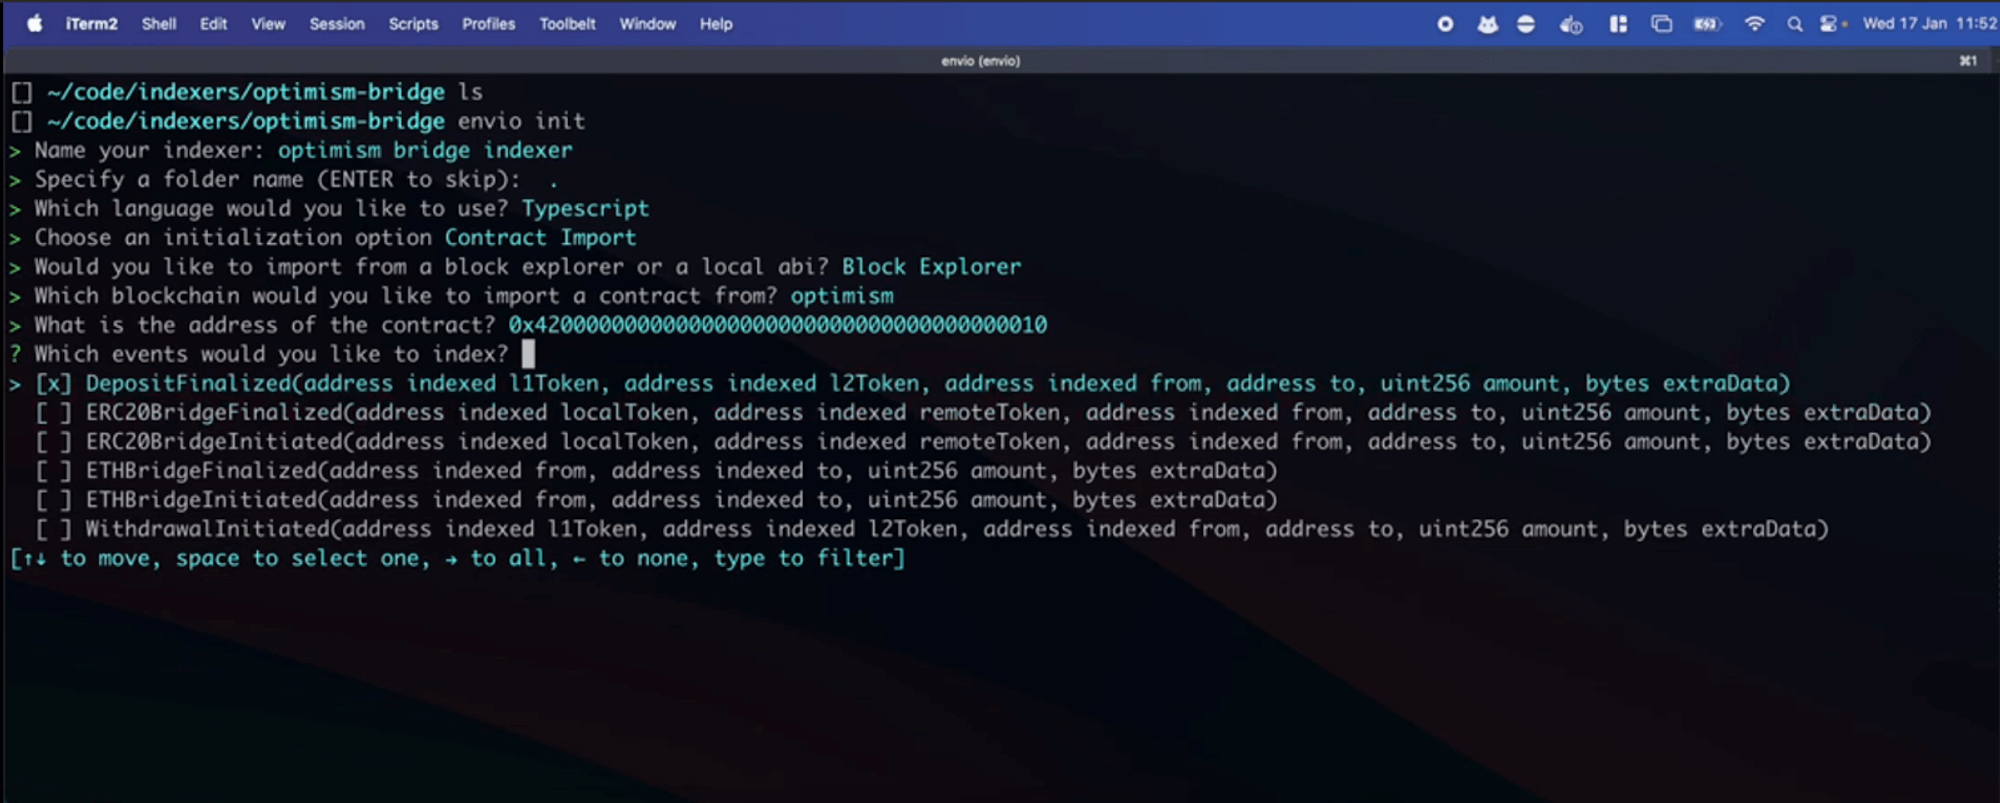
Block Explorerthen selectOptimism, insert the Optimism bridge contract address from OP Etherscan, and select the events you would like to index. In this case, we’ll be indexing thedeposit finalizedevent.
To select an event navigate using the arrow keys (↑ ↓) and click the space bar once you have made your choice.
Note: Multiple events can be selected and indexed at the same time.
Optimism bridge contract address: 0x4200000000000000000000000000000000000010
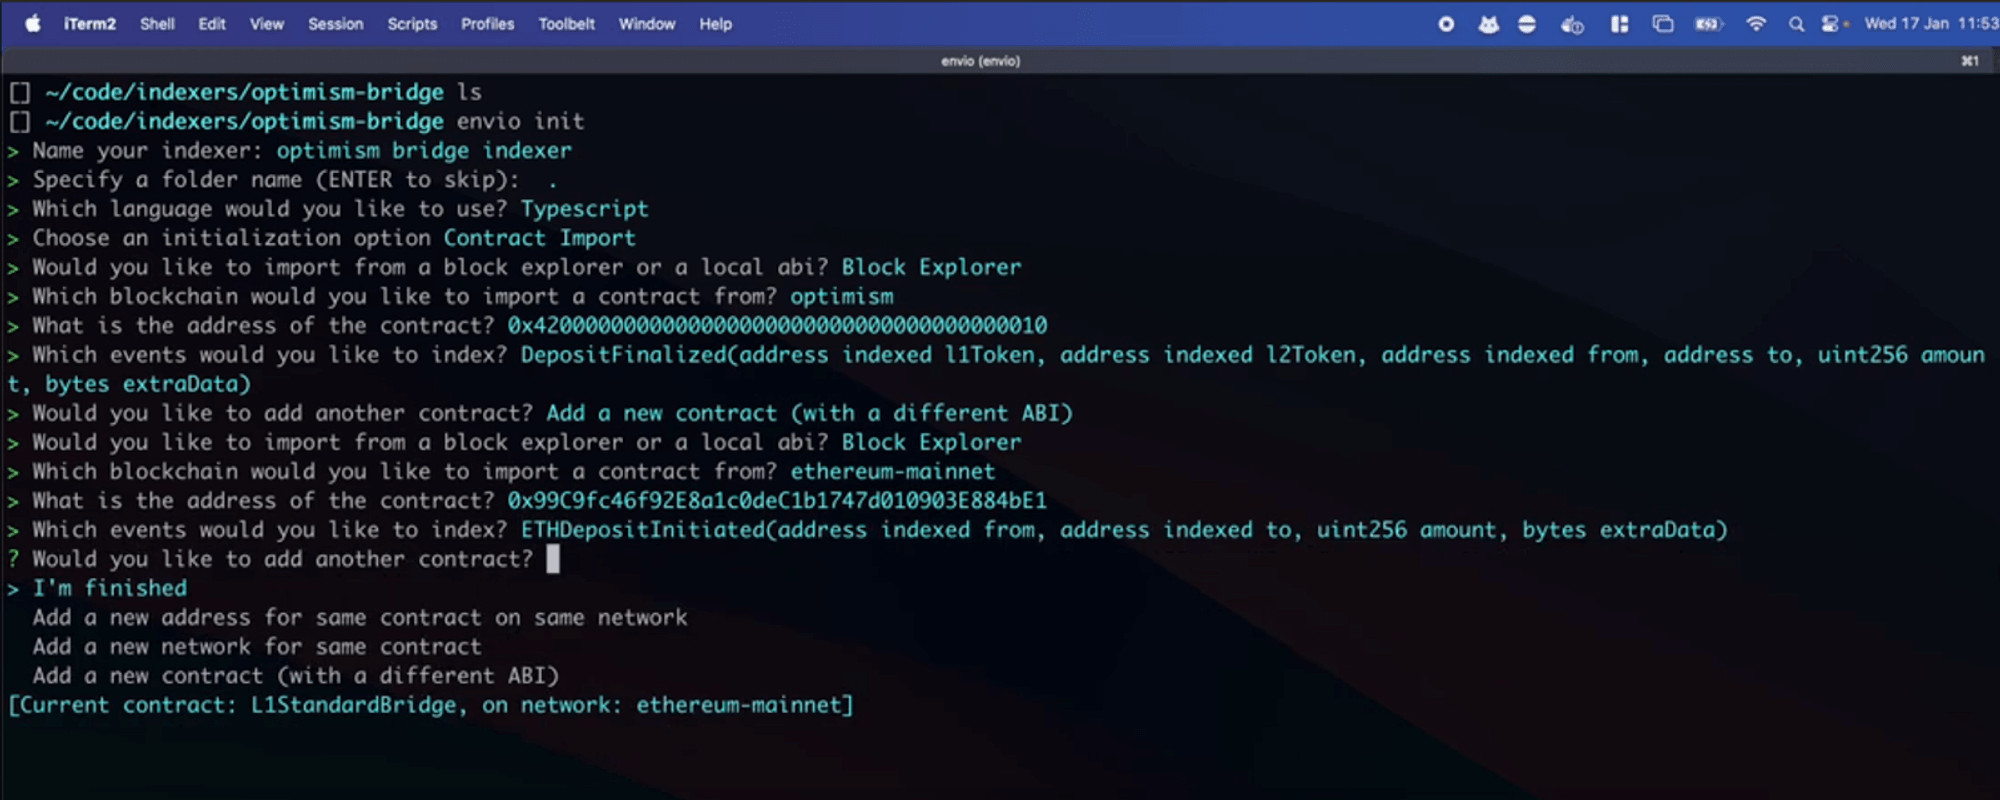
- Add another contract address, in this case, we’ve imported from the block explorer just like before, added the Optimism Gateway smart contract address on Ethereum Mainnet from Etherscan, and opted to index the events
eth deposit initiated. Finally, review the configuration and selectI’m finishedto start generating the indexer.
Ethereum Mainnet contract address: 0x99C9fc46f92E8a1c0deC1b1747d010903E884bE1
Starting the Indexer
Before starting your indexer, run the command below to ensure that no conflicting indexers are running.
Stopping the indexer:
pnpm envio stop
Note: Ignore if you’re a first-time user.
Start the indexer:
envio dev
Now, let's run our indexer locally by running the command below.
Overview of Generated Code
Now let's take a glance at the key files generated by Envio:
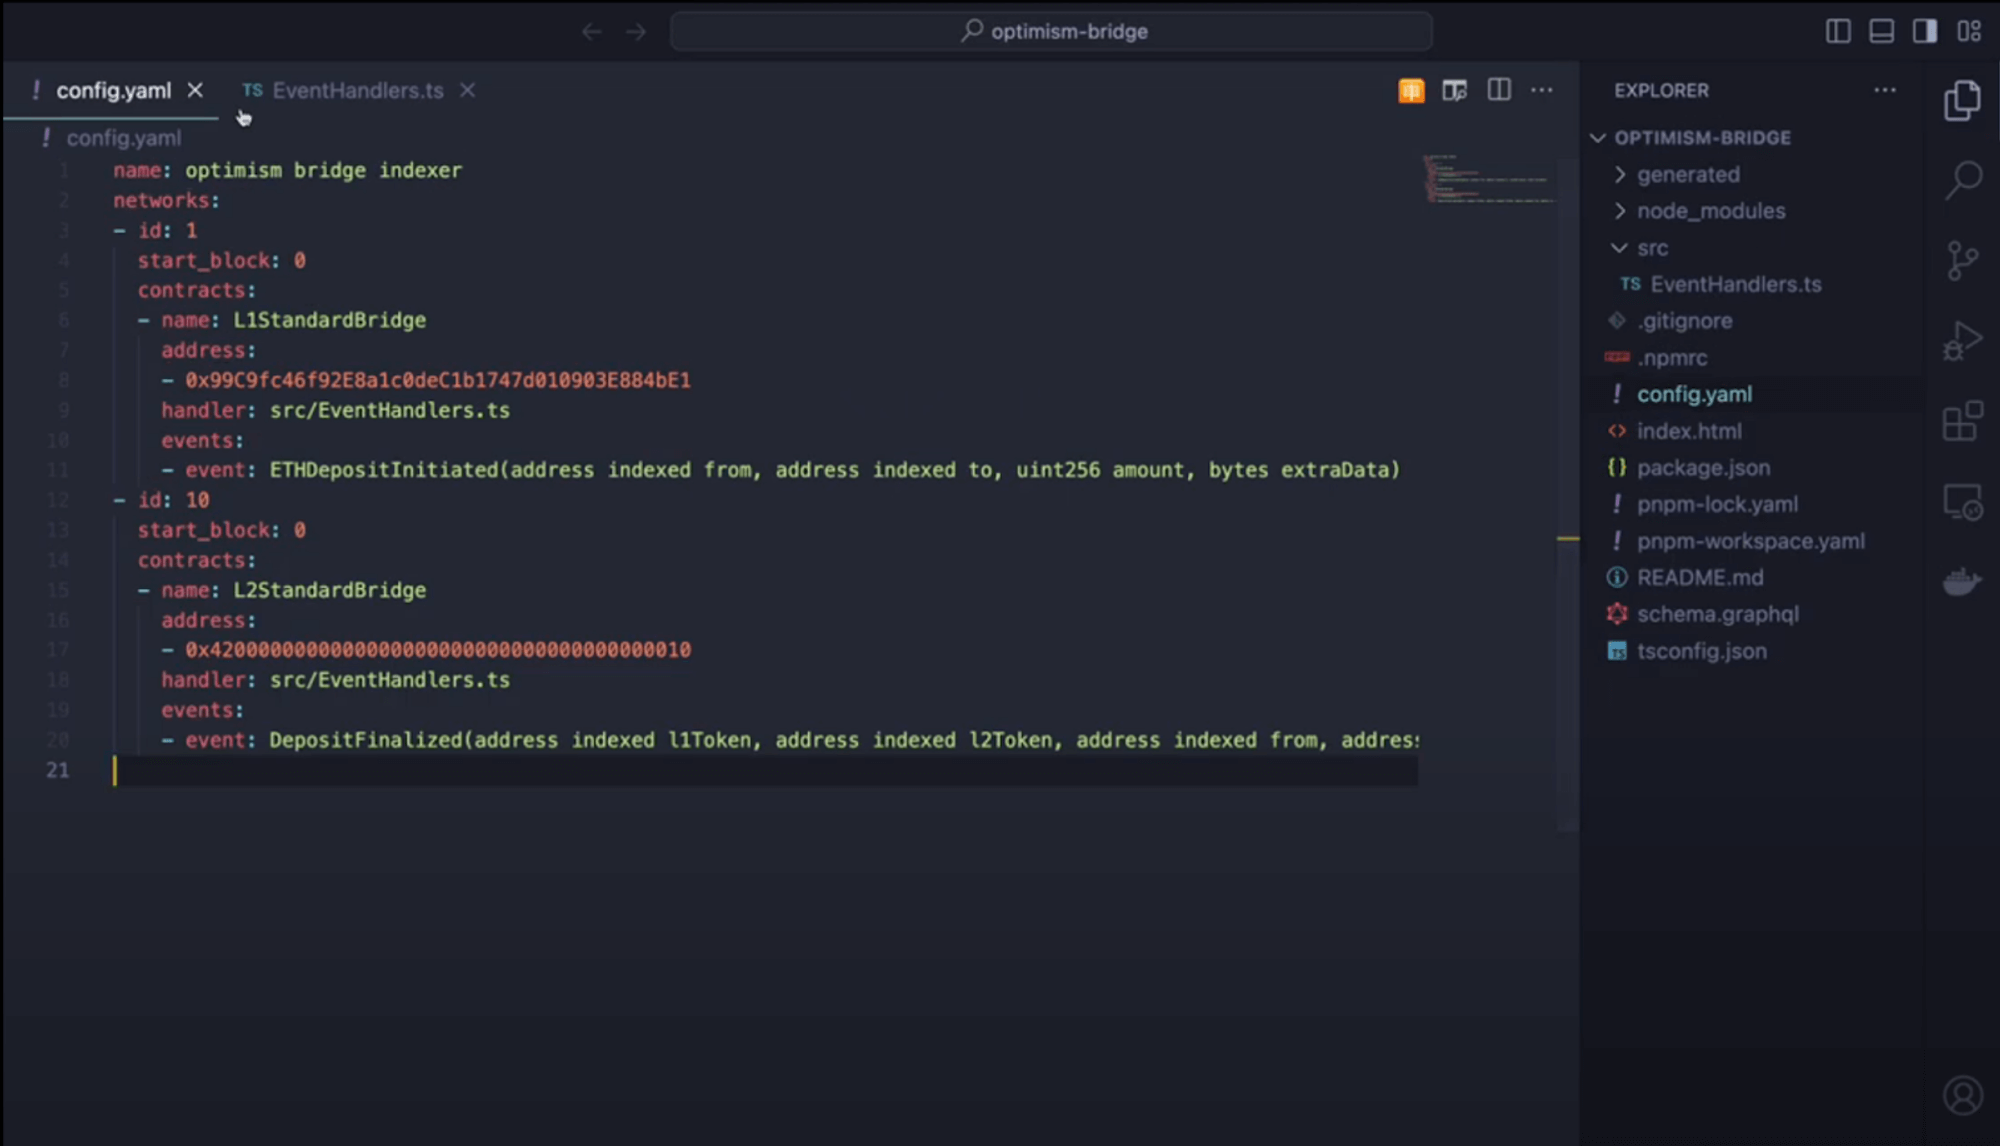
- config.yaml This file outlines networks, start blocks, addresses, and events we want to index, specifying Optimism and Ethereum Mainnet.
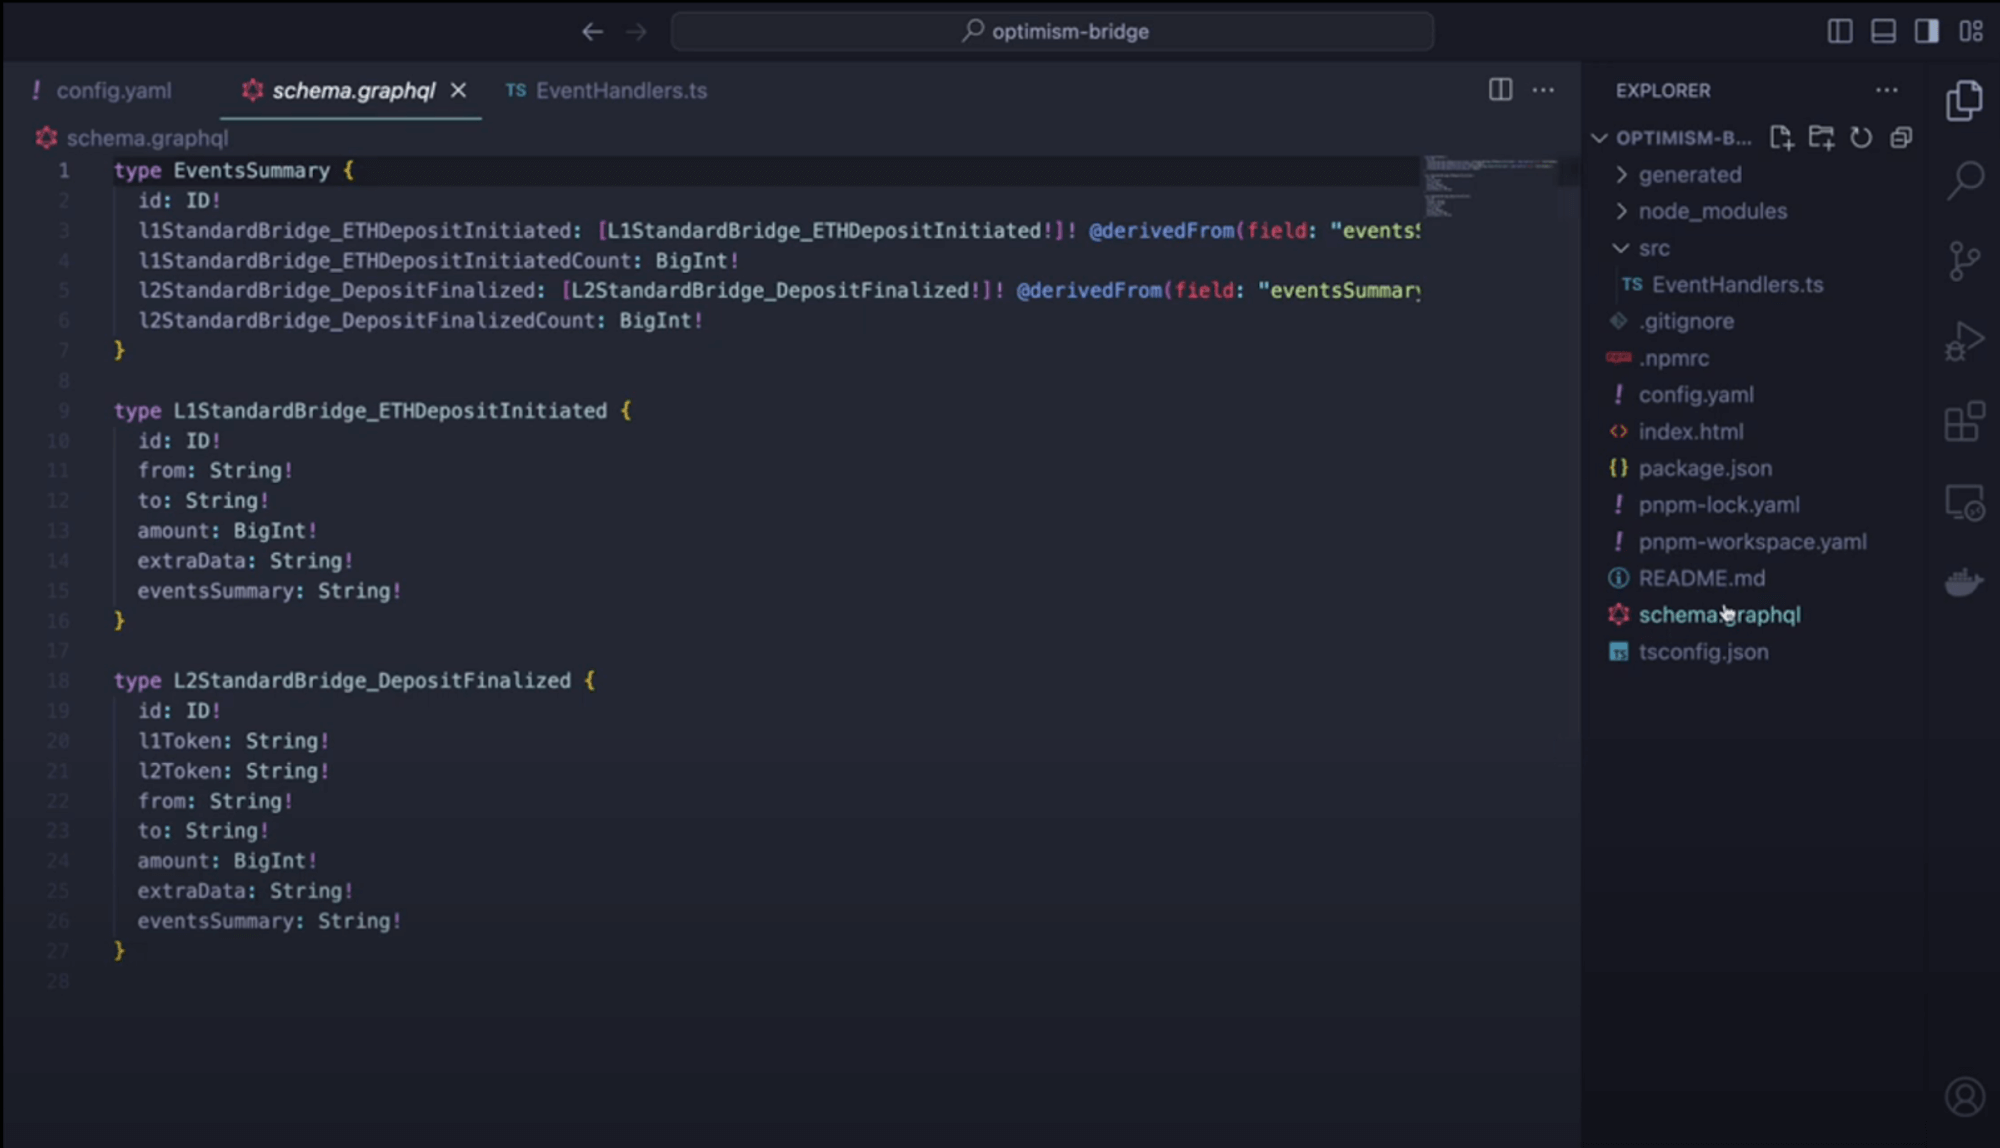
- schema.graphql
This file saves and defines the data structures for selected events, such as
eth deposit initiatedanddeposit finalized.
- event-handler.ts This file defines what happens when one of these events is emitted and saves what code is going to run, allowing customization in data handling.
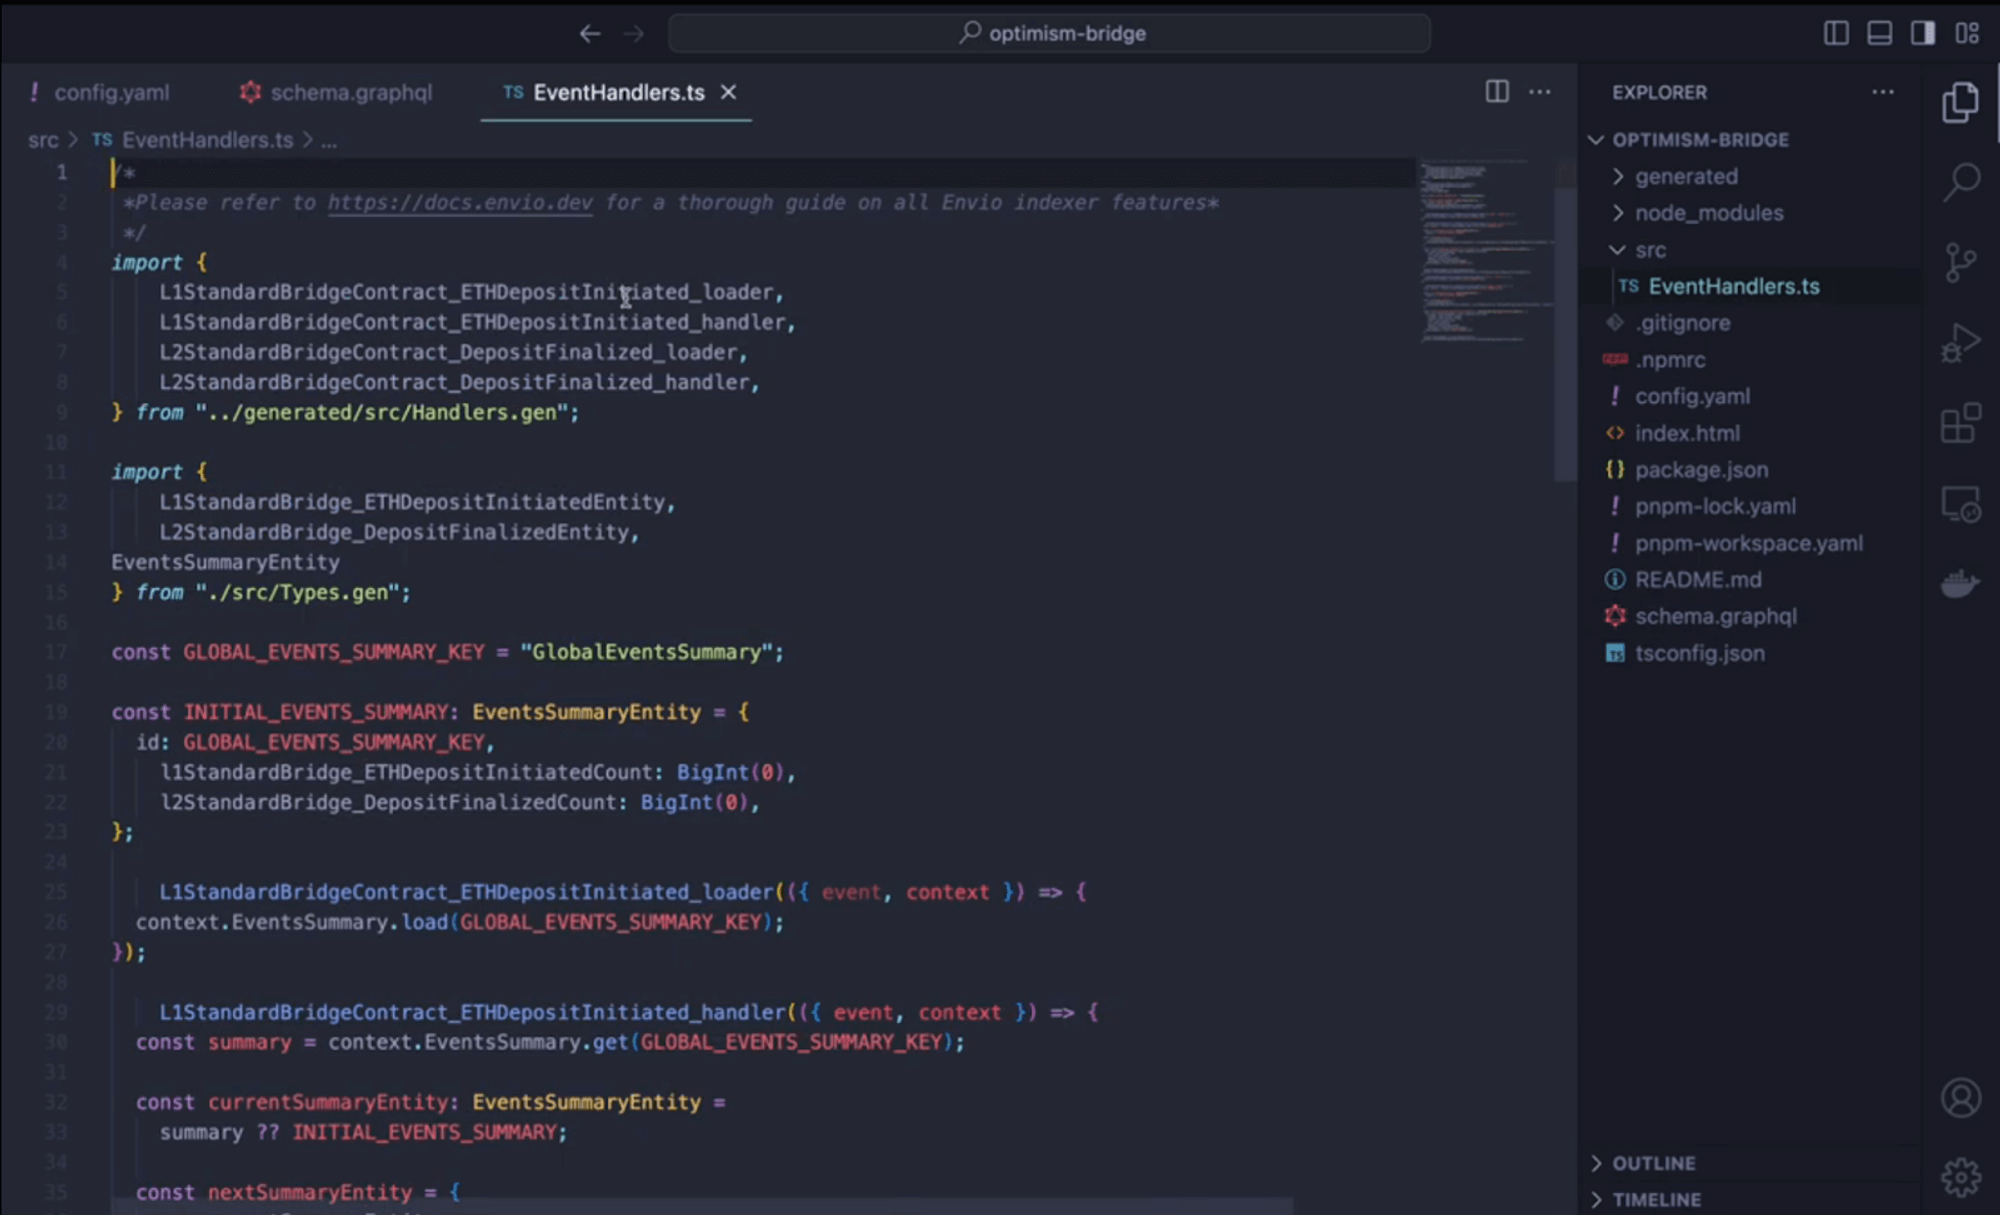
Exploring the Indexed Data
Time to reap the rewards of your indexing efforts:
- Head over to Hasura, type in the admin-secret password
testing, and click “API” in the above column to access the GraphQL endpoint to query real-time data.
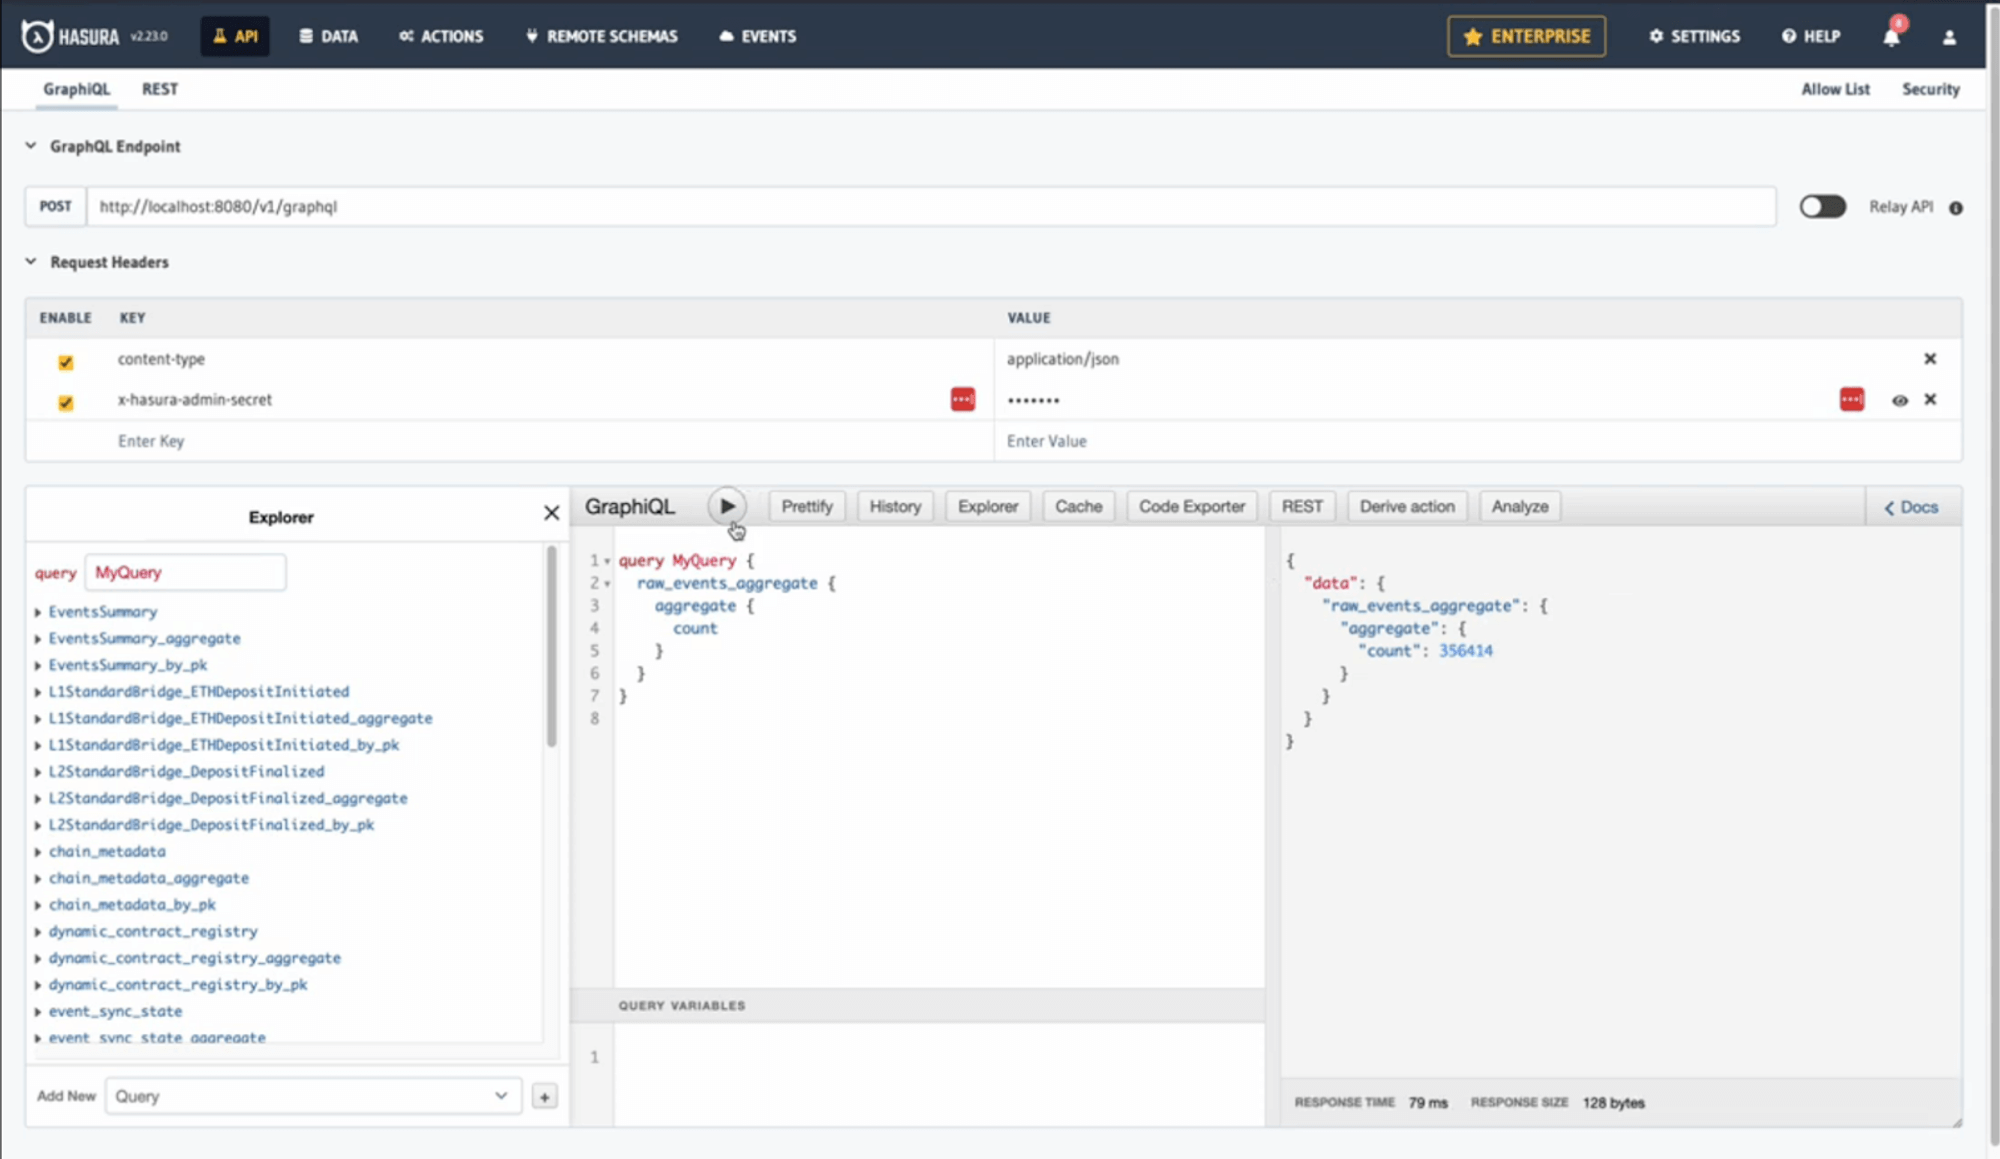
- Now click on “Data” in the above column to monitor the indexing progress on Ethereum Mainnet and Optimism through the events sync state table to see which block number you are on.
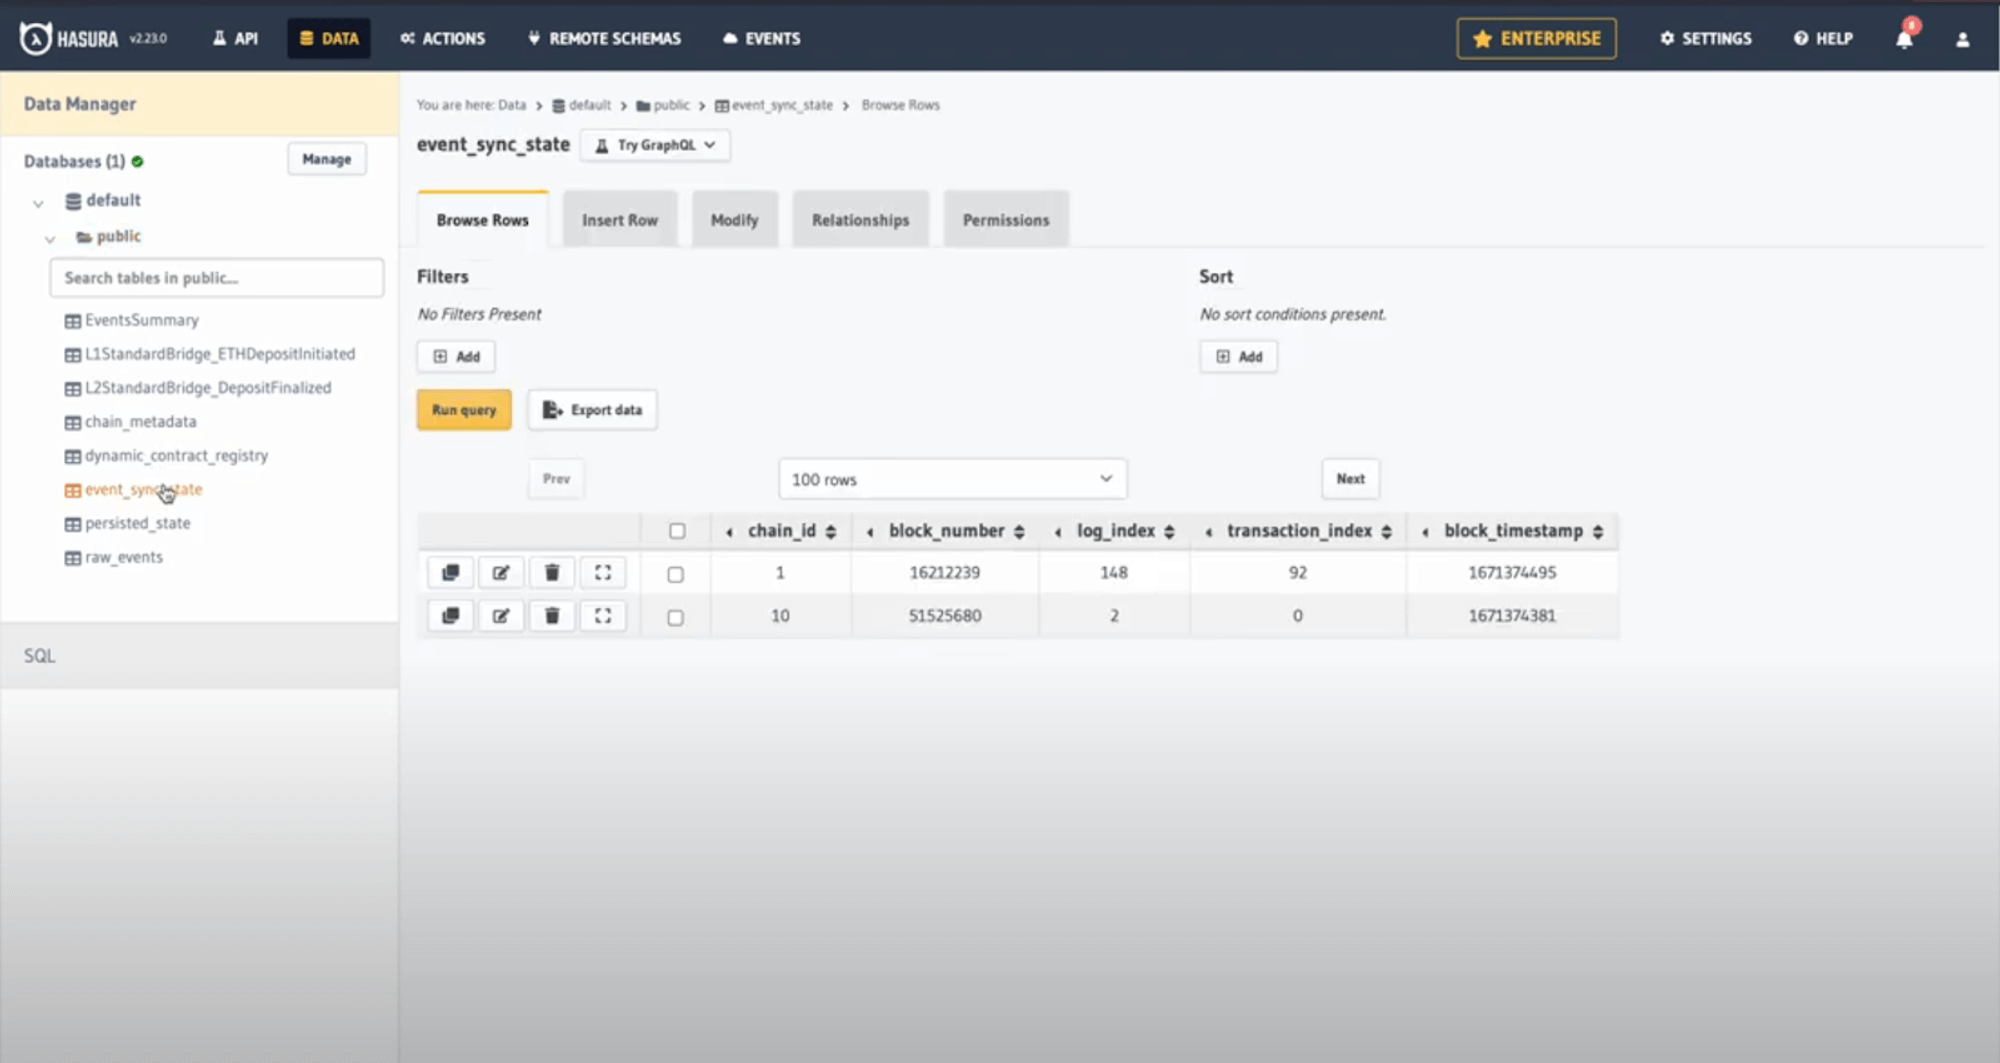
In general, if you wanted to index hundreds of millions of blocks and save hundreds and thousands of events this would usually take hours if not days using standard RPC but with Envio’s HyperSync developers can reduce this process to a couple of minutes or even seconds.
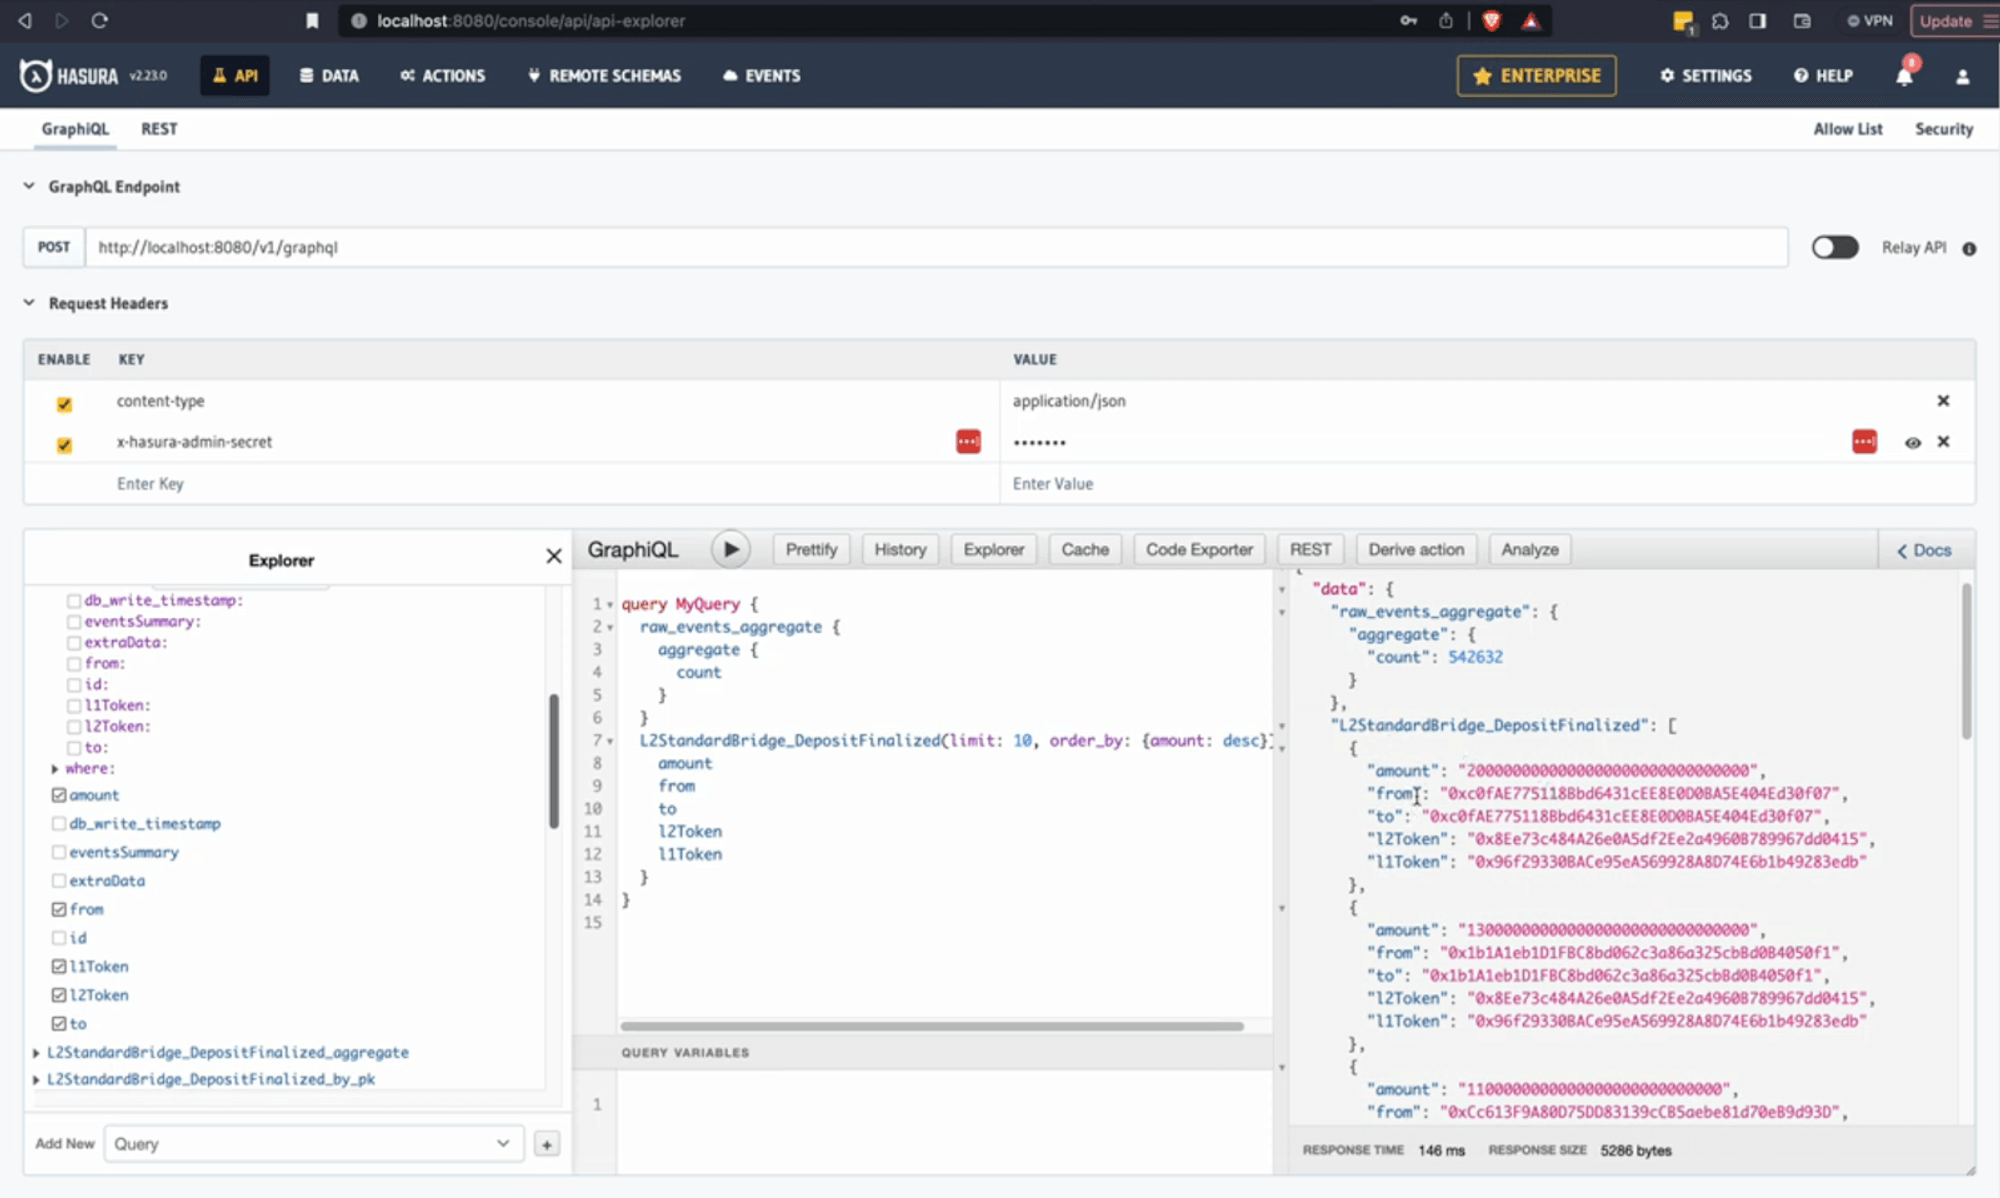
- Now let’s have a look at some of the events by heading back to “API” in the above column. From there you can run a query-specific event, in this case, "deposit finalized" to explore details such as amounts, senders, and recipients.
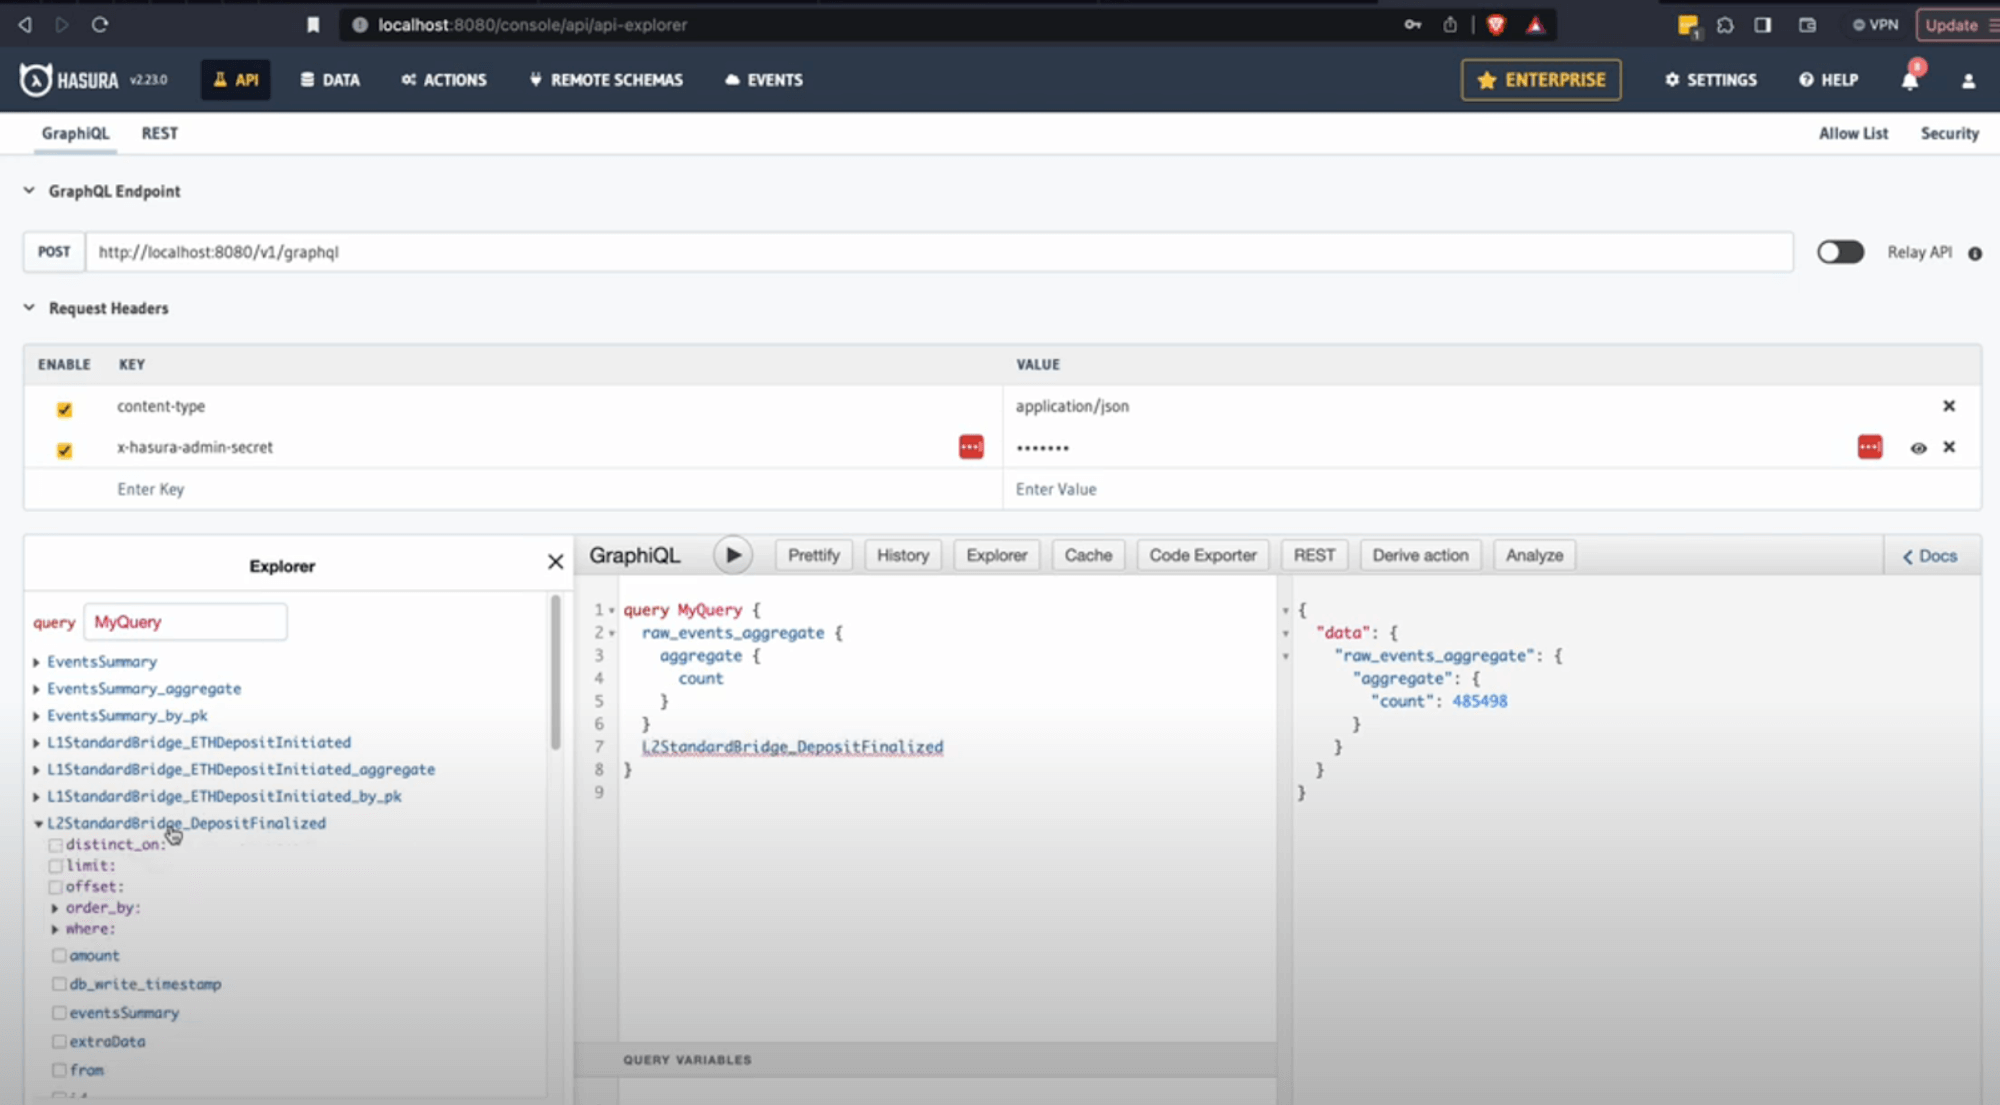
For example: Let’s look at getting 10 "deposit finalized" events, and order them by the amount we would like to appear first (in this case: desc = greatest amount), the amounts being bridged, who it’s from, who it’s to, and the different L1 and L2 tokens.
Once you have selected your desired events run the query by clicking the play button ( ▶️) to gain access to the real-time indexed data
Conclusion
And just like that, you've successfully indexed the Optimism Bridge contracts on both Optimism and Ethereum Mainnet using the Envio HyperIndex contract import feature.
Be sure to check out our video walkthrough on Youtube, including other tutorials that showcase Envio’s indexing features and capabilities.