Indexing Optimism Bridge Deposits
Introduction
This tutorial will guide you through indexing Optimism Standard Bridge deposits in under 5 minutes using Envio HyperIndex's no-code contract import feature.
The Optimism Standard Bridge enables the movement of ETH and ERC-20 tokens between Ethereum and Optimism. We'll index bridge deposit events by extracting the DepositFinalized logs emitted by the bridge contracts on both networks.
Prerequisites
Before starting, ensure you have the following installed:
- Node.js (v22 or newer recommended)
- pnpm (recommended but not required)
- Docker Desktop (required to run the Envio indexer locally)
Note: Docker is specifically required to run your blockchain indexer locally. You can skip Docker installation if you plan only to use Envio Cloud.
Step 1: Initialize Your Indexer
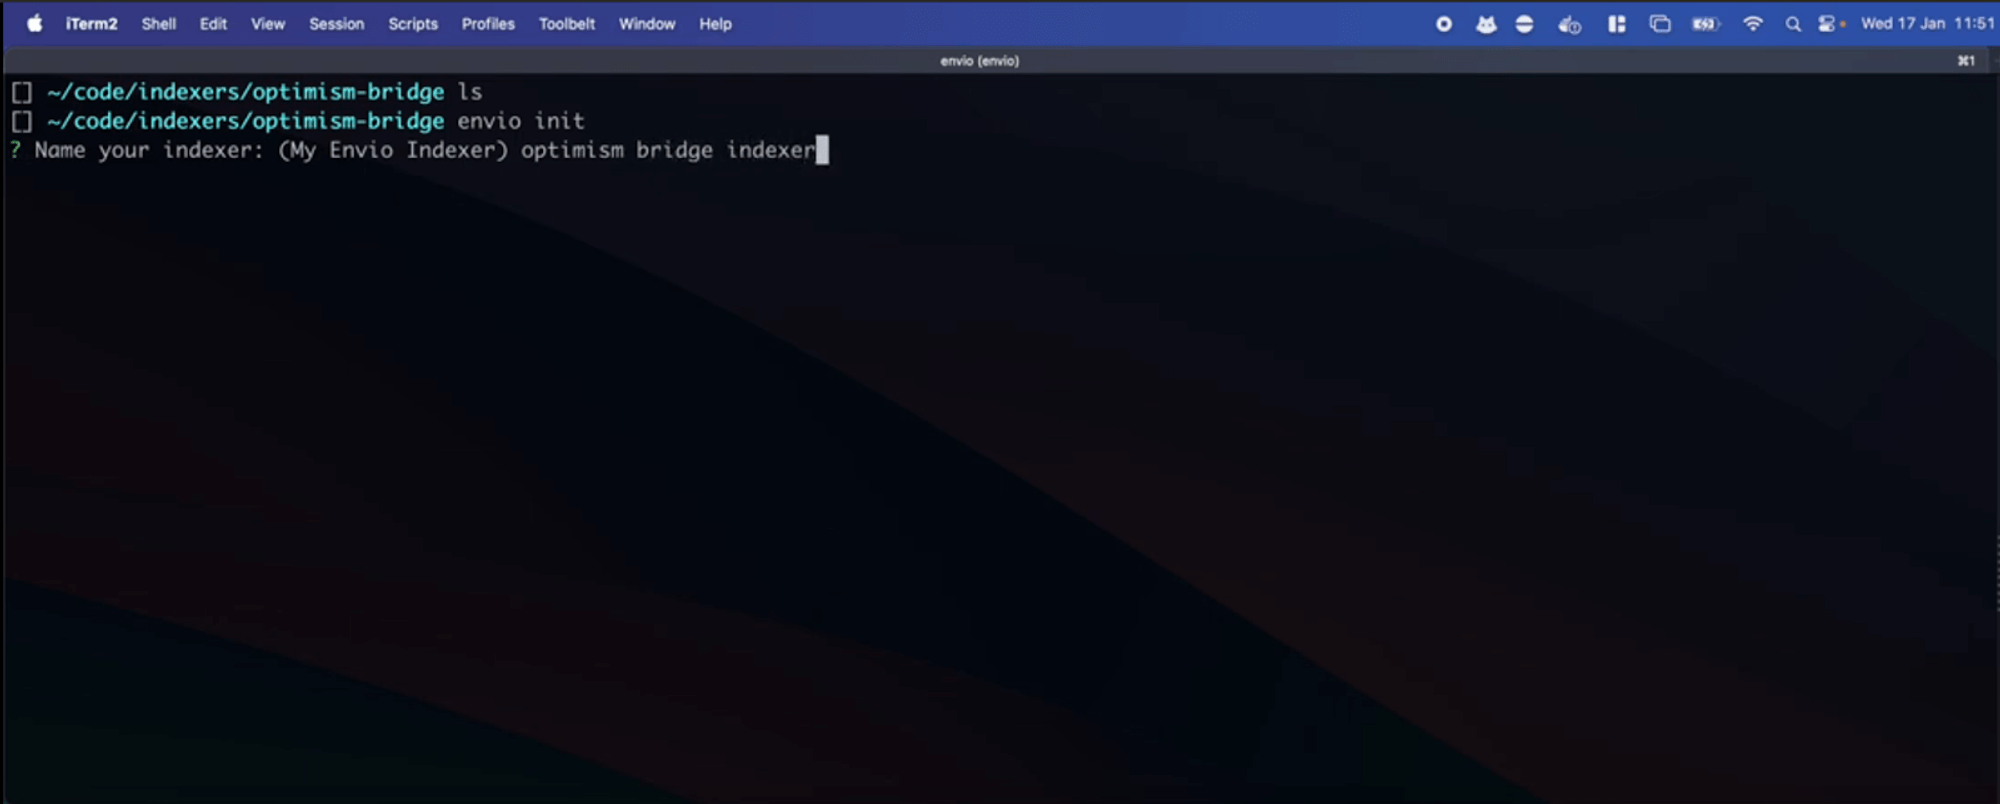
- Open your terminal in an empty directory and run:
pnpx envio init
- Name your indexer (we'll use "optimism-bridge-indexer" in this example):
- Choose your preferred language (TypeScript, JavaScript, or ReScript):
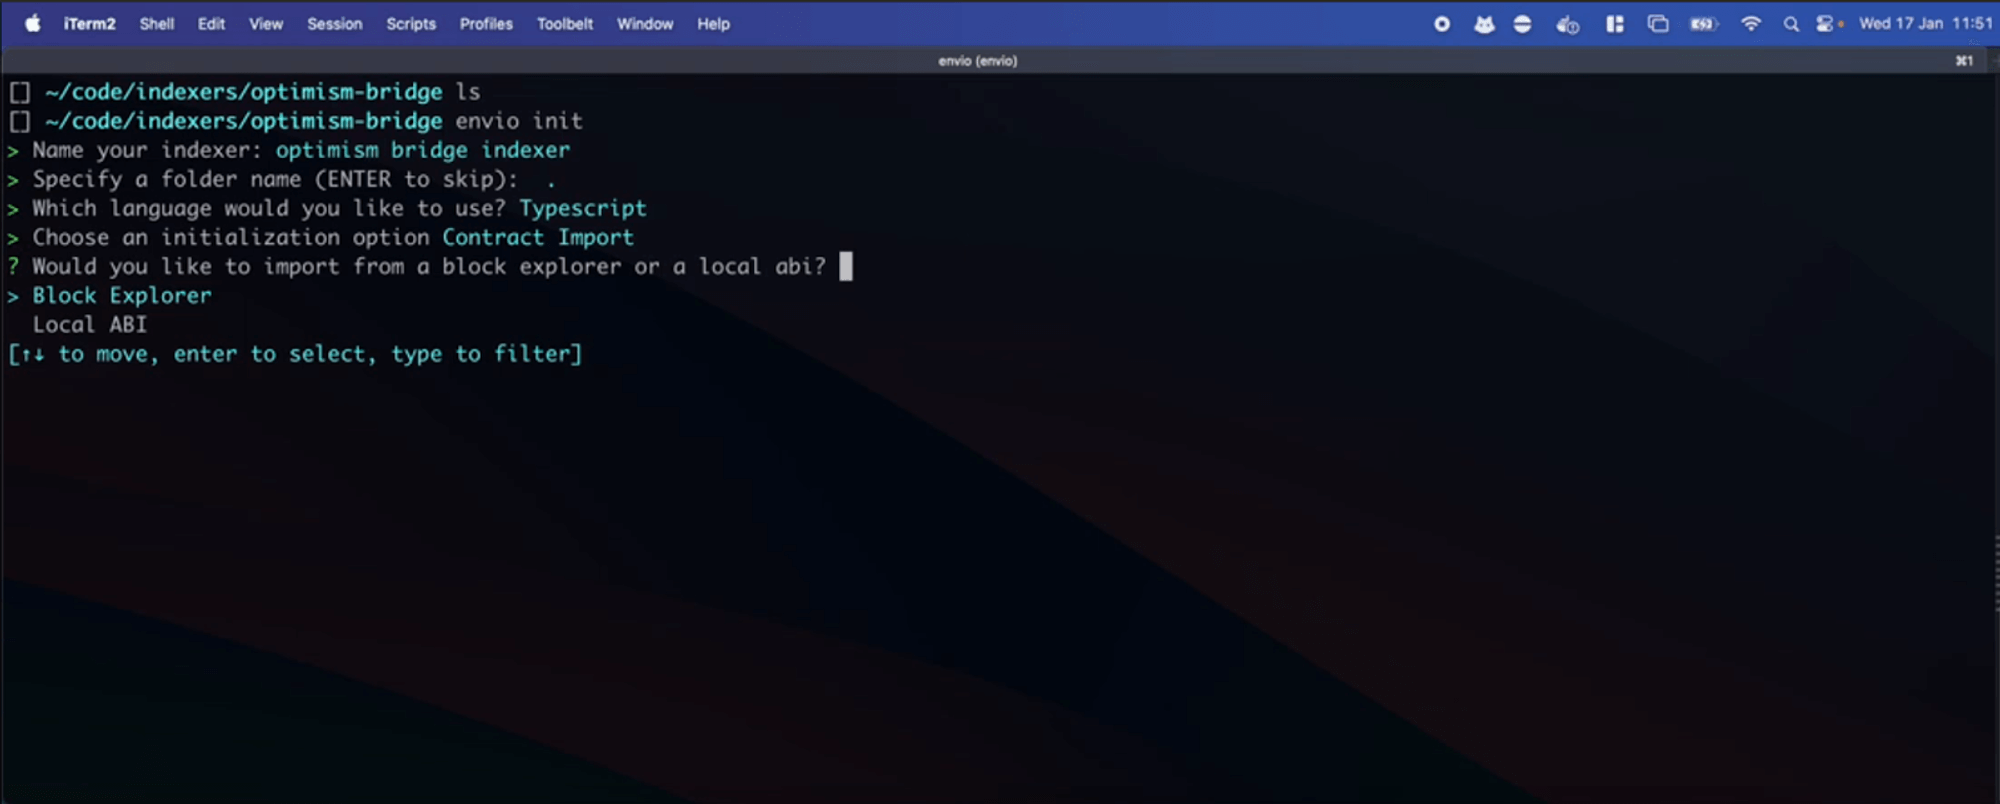
Step 2: Import the Optimism Bridge Contract
-
Select Contract Import → Block Explorer → Optimism
-
Enter the Optimism bridge contract address:
0x4200000000000000000000000000000000000010 -
Select the
DepositFinalizedevent:- Navigate using arrow keys (↑↓)
- Press spacebar to select the event
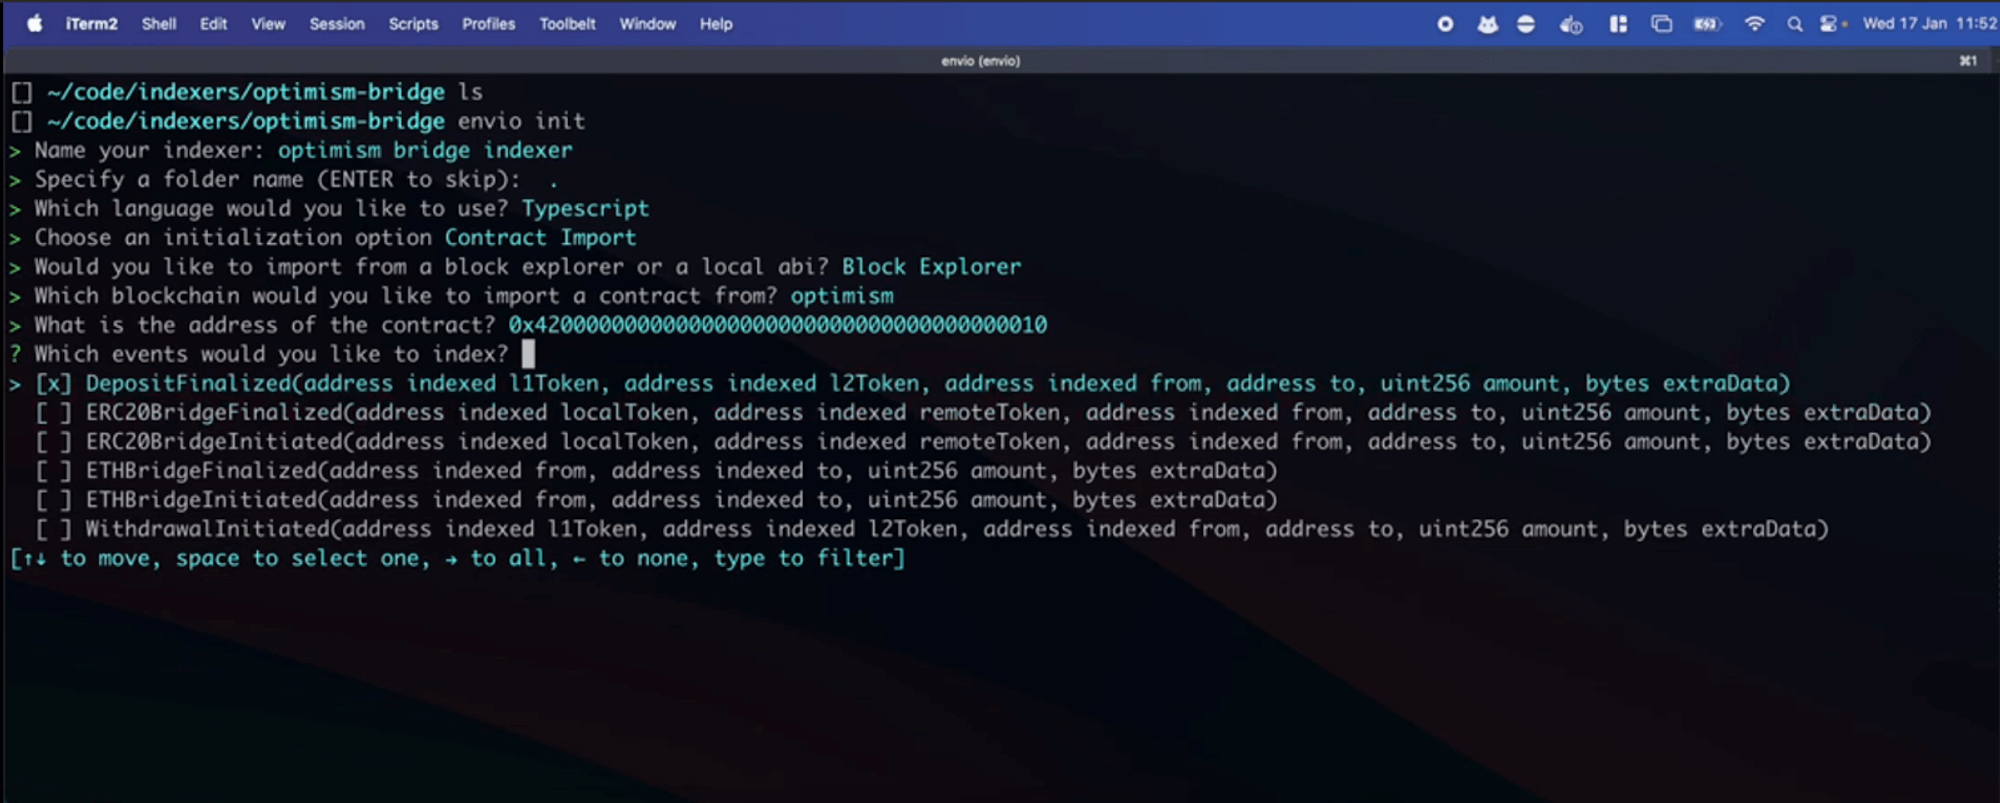
Tip: You can select multiple events to index simultaneously.
Step 3: Add the Ethereum Mainnet Bridge Contract
-
When prompted, select Add a new contract
-
Choose Block Explorer → Ethereum Mainnet
-
Enter the Ethereum Mainnet gateway contract address:
0x99C9fc46f92E8a1c0deC1b1747d010903E884bE1 -
Select the
ETHDepositInitiatedevent -
When finished adding contracts, select I'm finished

Step 4: Start Your Indexer
- If you have any running indexers, stop them first:
pnpm envio stop
- Start your new indexer:
pnpm dev
This command:
- Starts the required Docker containers
- Sets up your database
- Launches the indexing process
- Opens the Hasura GraphQL interface
Step 5: Understanding the Generated Code
Let's examine the key files that Envio generated:
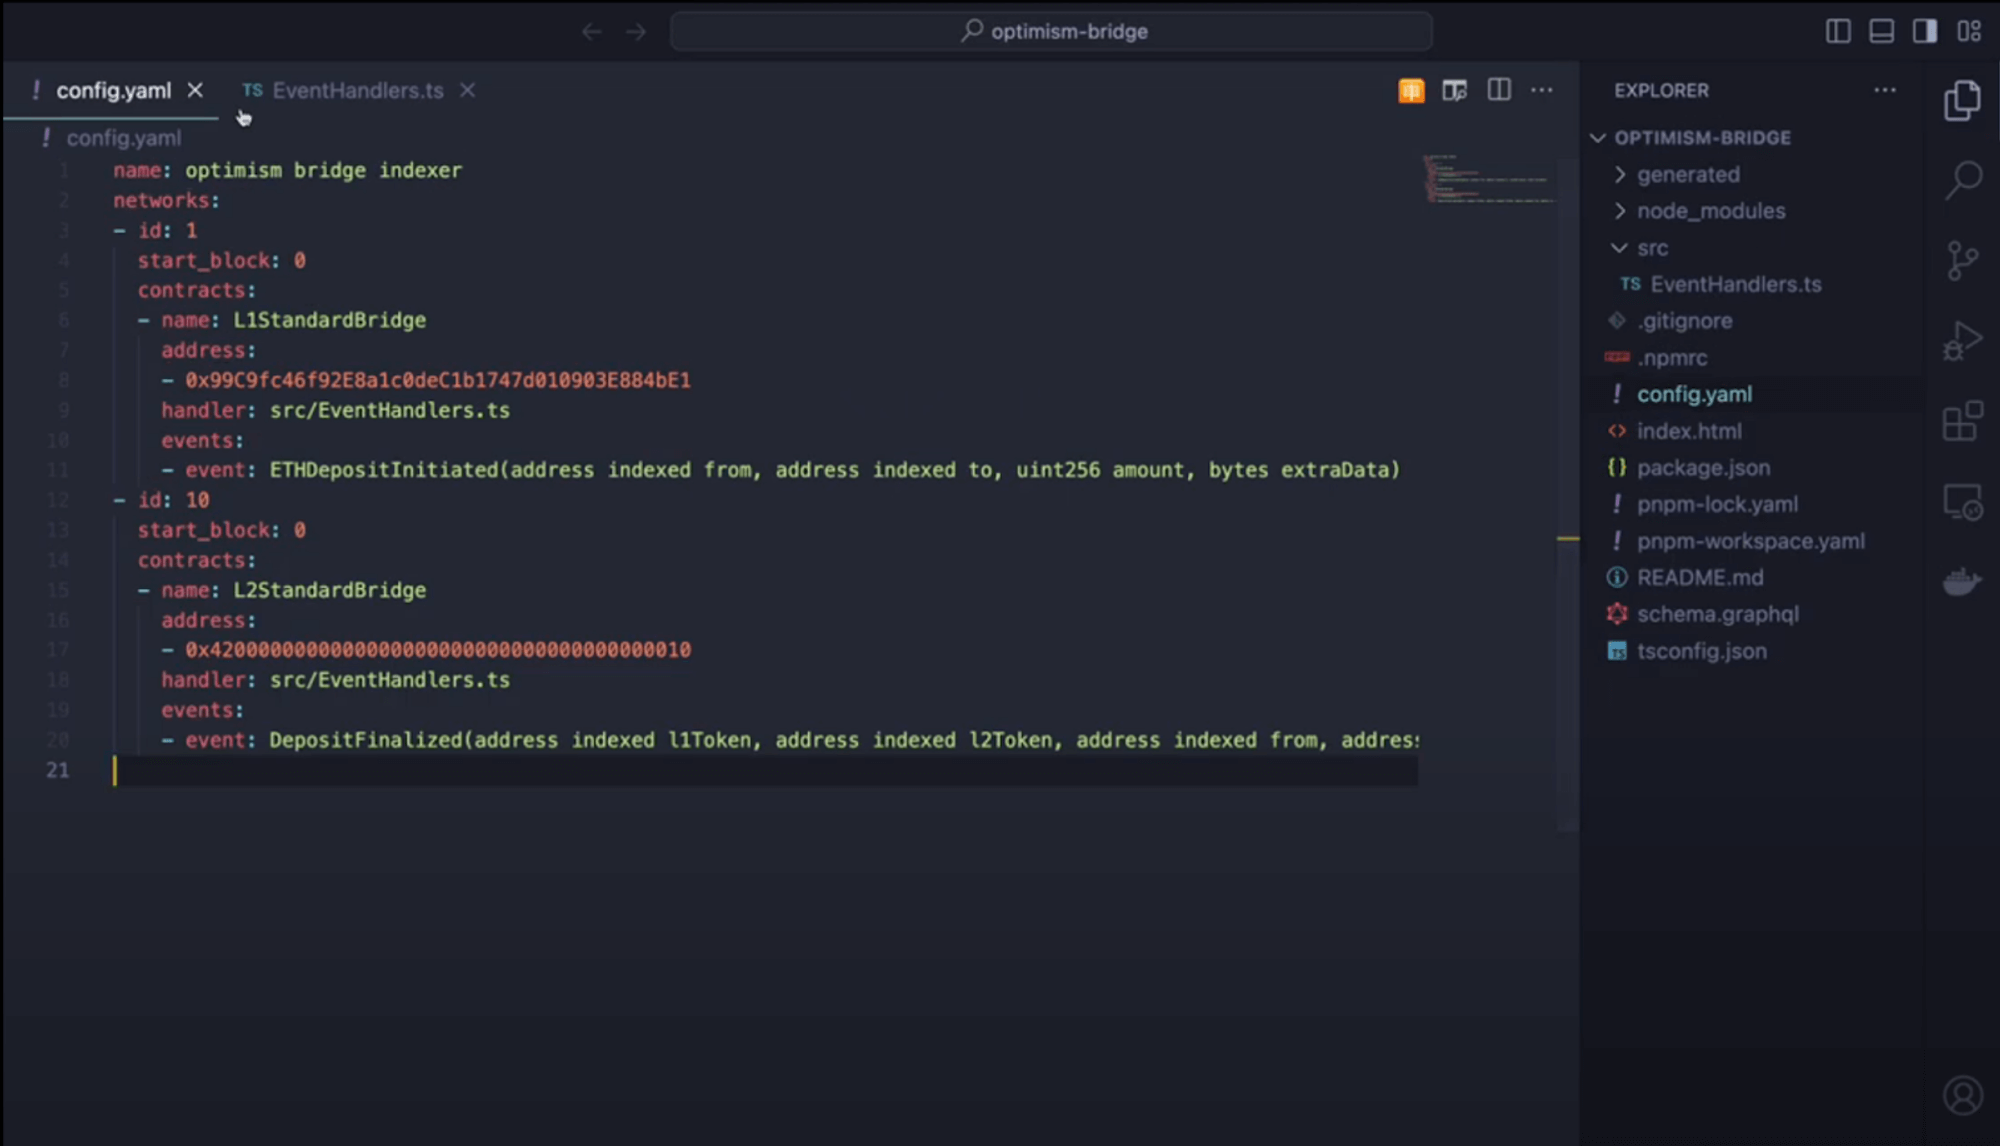
1. config.yaml
This configuration file defines:
- Networks to index (Optimism and Ethereum Mainnet)
- Starting blocks for each network
- Contract addresses and ABIs
- Events to track
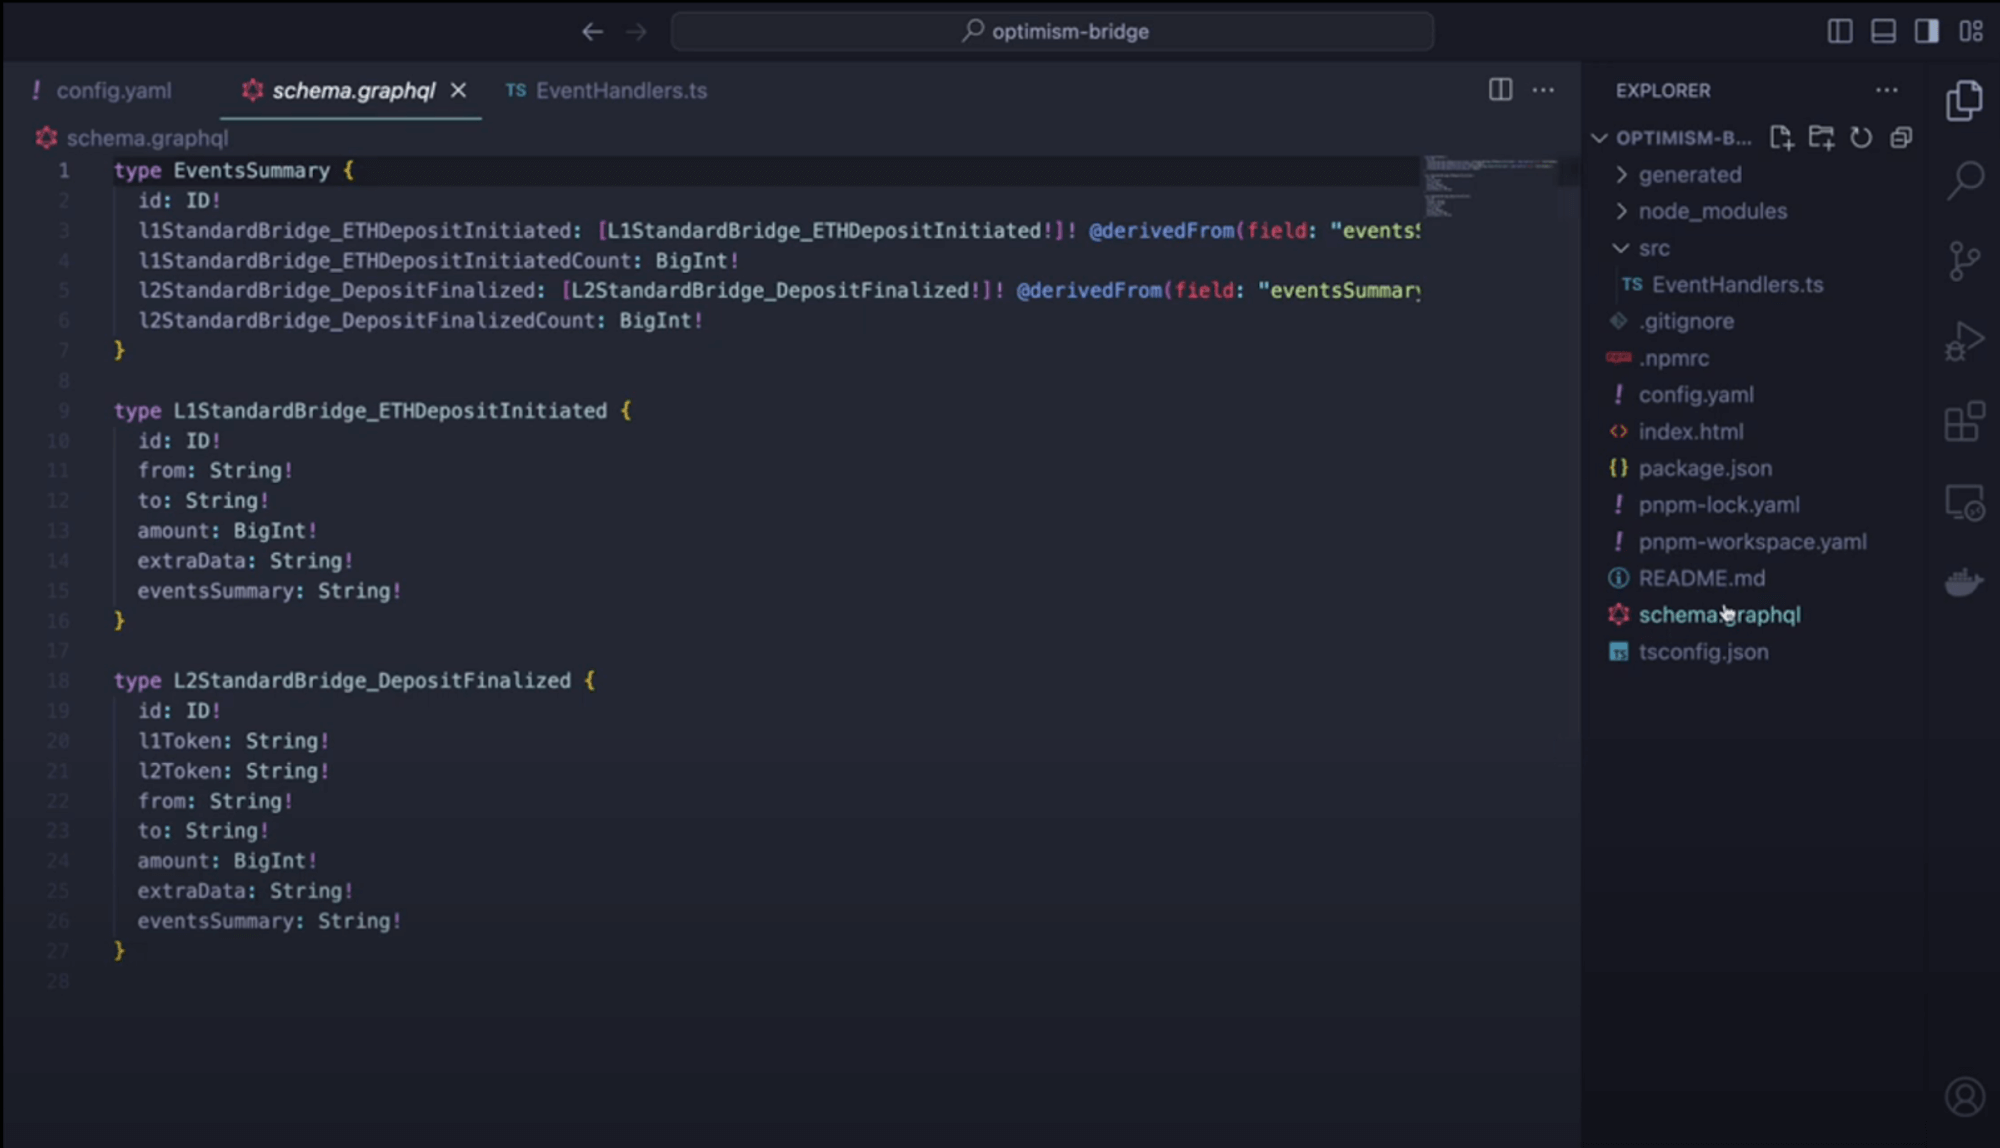
2. schema.graphql
This schema defines the data structures for our selected events:
- Entity types based on event data
- Field types matching the event parameters
- Relationships between entities (if applicable)
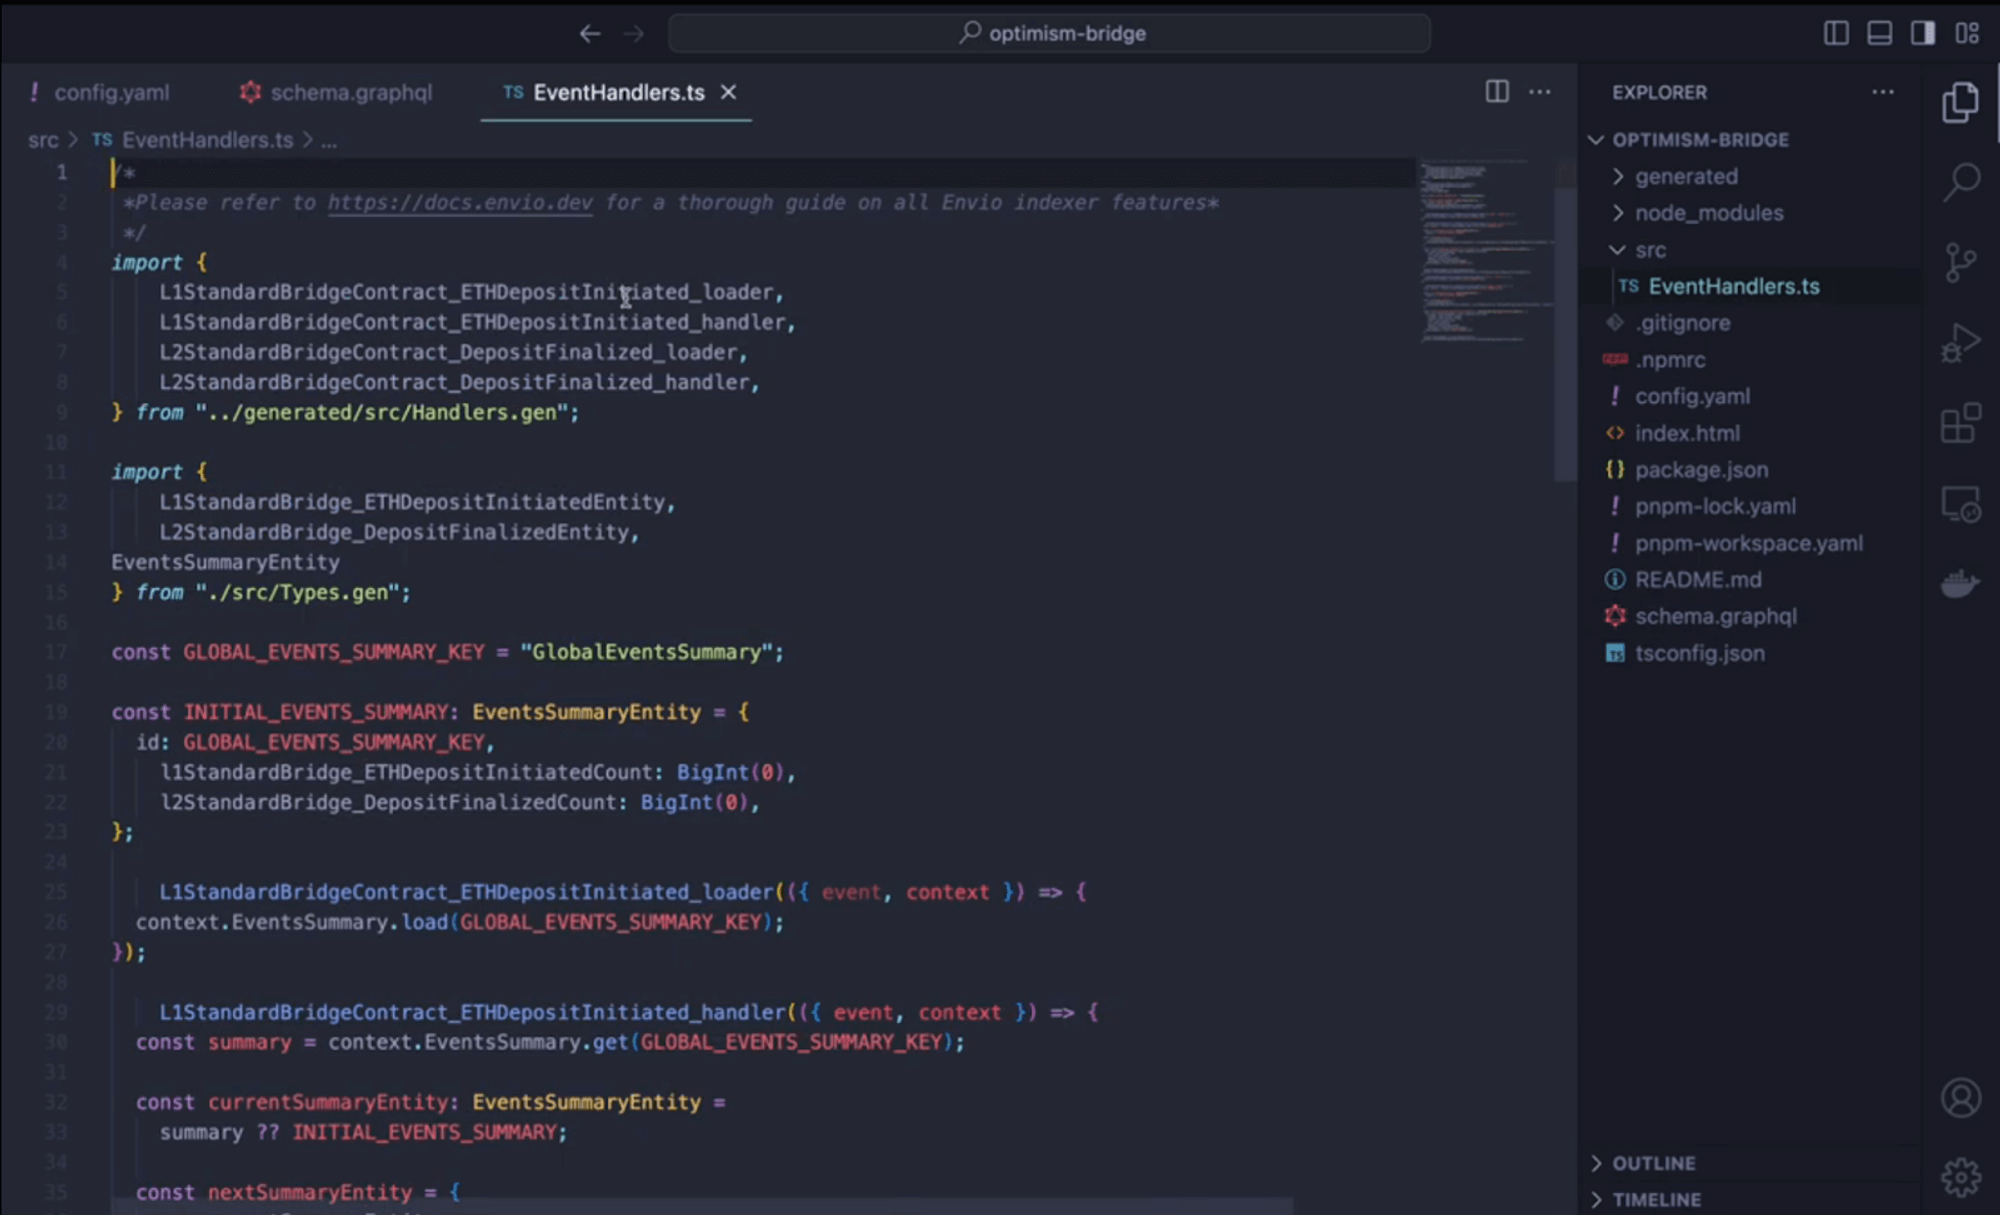
3. src/handlers
This file contains the business logic for processing events:
- Functions that execute when events are detected
- Data transformation and storage logic
- Entity creation and relationship management
Step 6: Exploring Your Indexed Data
Now you can interact with your indexed data:
Accessing Hasura
- Open Hasura at http://localhost:8080
- When prompted, enter the admin password:
testing
Monitoring Indexing Progress
- Click the Data tab in the top navigation
- Find the
_events_sync_statetable to check indexing progress - Observe which blocks are currently being processed
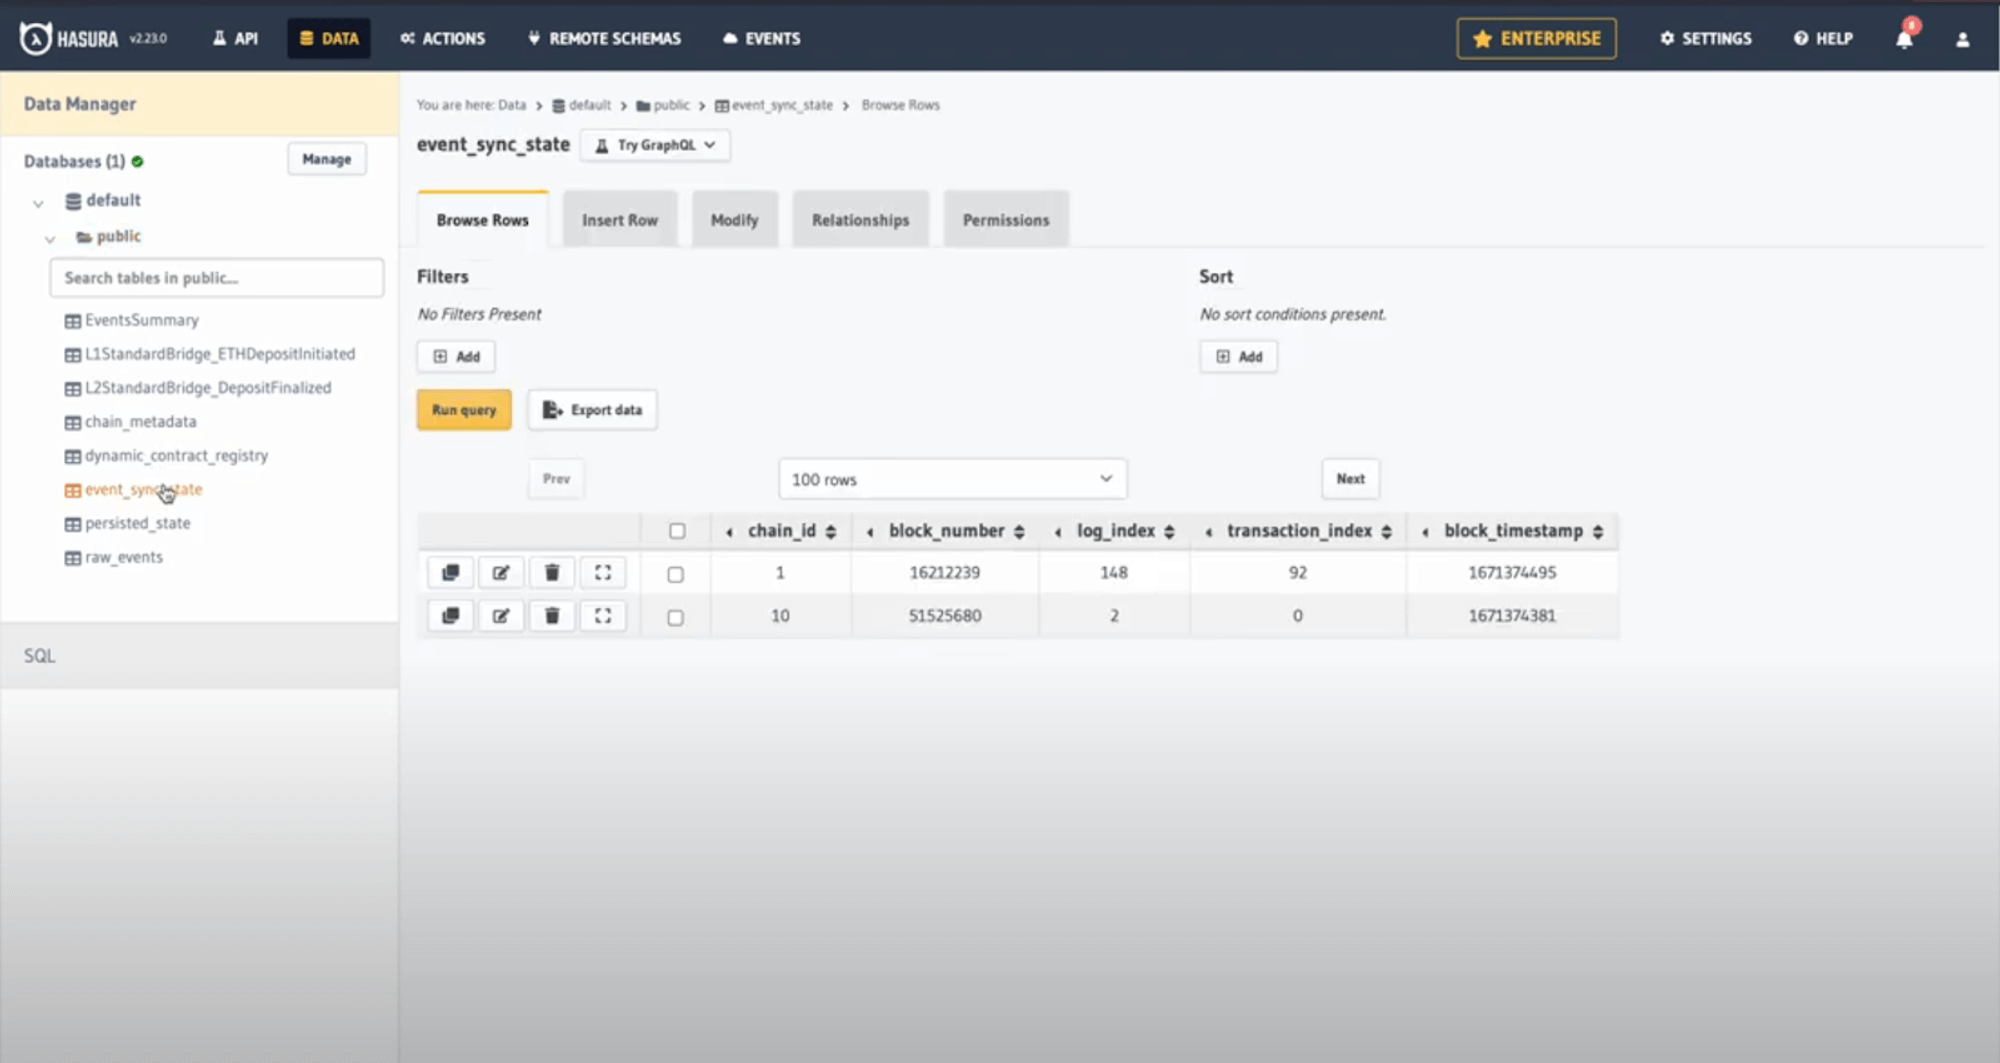
Note: Thanks to Envio's HyperSync, indexing happens significantly faster than with standard RPC methods.
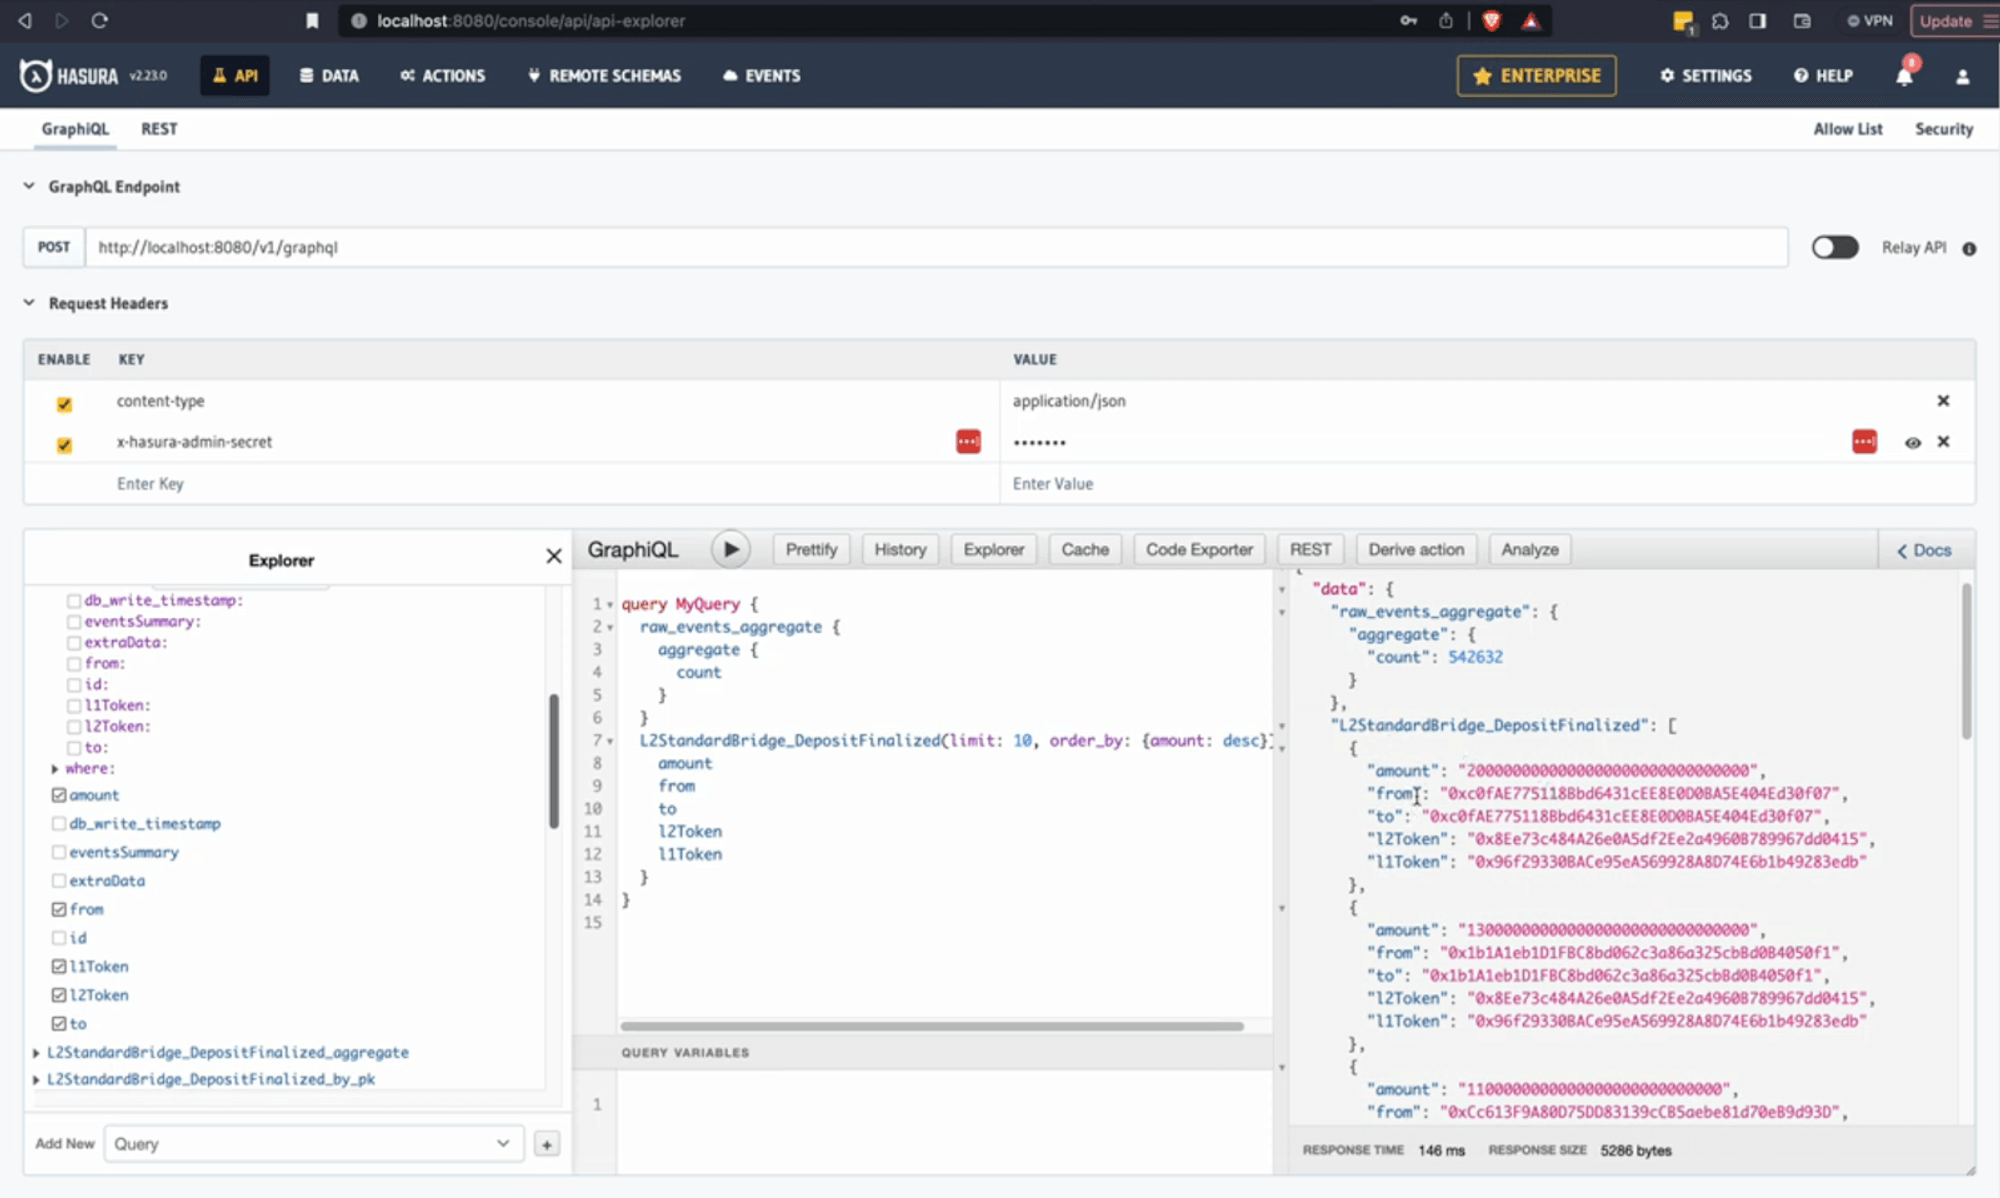
Querying Indexed Events
- Click the API tab
- Construct a GraphQL query to explore your data
Here's an example query to fetch the 10 largest bridge deposits:
query LargestDeposits {
  DepositFinalized(limit: 10, order_by: { amount: desc }) {
    l1Token
    l2Token
    from
    to
    amount
    blockTimestamp
  }
}
- Click the Play button to execute your query
Conclusion
Congratulations! You've successfully created an indexer for Optimism Bridge deposits across both Ethereum and Optimism networks.
What You've Learned
- How to initialize a multi-network indexer using Envio
- How to import contracts from different blockchains
- How to query and explore indexed blockchain data
Next Steps
- Try customizing the event handlers to add additional logic
- Create relationships between events on different networks
- Deploy your indexer to Envio Cloud
For more tutorials and advanced features, check out our documentation or watch our video walkthroughs on YouTube.