Deploying Your Indexer
Envio Cloud provides a seamless git-based deployment workflow, similar to modern platforms like Vercel. This enables you to easily deploy, update, and manage your blockchain indexers through your normal development workflow.
Prerequisites & Important Information
Requirements
-
Version Support: We strongly advise using the latest release version for improved deployment performance. Envio Cloud requires a minimum version of at least
2.21.5. Additionally, the following versions are not supported on Envio Cloud:2.29.x
-
PNPM Support: the deployment must be compatible with pnpm version
10.32.0 -
Repository Folder:
- Package.json: a
package.jsonfile must be present in the root folder and support the above two requirements, with the envio version explicitly configured in the dependencies. - Configuration file: a HyperIndex configuration file must be present.
The root folder and configuration file name can be set in the indexer settings.
- Package.json: a
-
GitHub Repository: The repository must be no larger than
100MB. Caching between deployments is supported for paid plans using the Effects Api. -
Node Version: It is strongly recommended that the indexer is compatible with node version 24 or higher.
Before deploying your indexer, please be aware of the below limits and policies
Deployment Limits
- 3 development plan indexers per organization
- Deployments per indexer: 3 deployments per indexer
- Deployments can be deleted in Envio Cloud to make space for more deployments
Development Plan Fair Usage Policy
The free development plan includes automatic deletion policies to ensure fair resource allocation:
Automatic Deletion Rules:
- Hard Limits:
- Deployments that exceed 20GB of storage will be automatically deleted
- Deployments older than 30 days will be automatically deleted
- Soft Limits (whichever comes first):
- 100,000 events processed
- 5GB storage used
- no requests for 7 days
When soft limits are breached, the two-stage deletion process begins
Two-Stage Deletion Process
Applies to development deployments that breach the soft limits
- Grace Period (7 days) - Your indexer continues to function normally, you receive notification about the upcoming deletion
- Read-Only Access (3 days) - Indexer stops processing new data, existing data remains accessible for queries
- Full Deletion - Indexer and all data are permanently deleted
The grace period durations (7 + 3 days) are subject to change. Always monitor your deployment status and upgrade when approaching limits.
For complete pricing details and feature comparison, see our Pricing & Billing page.
Step-by-Step Deployment Instructions
Initial Setup
- Log in with GitHub: Visit the Envio App and authenticate with your GitHub account
- Select an Organization: Choose your personal account or any organization you have access to
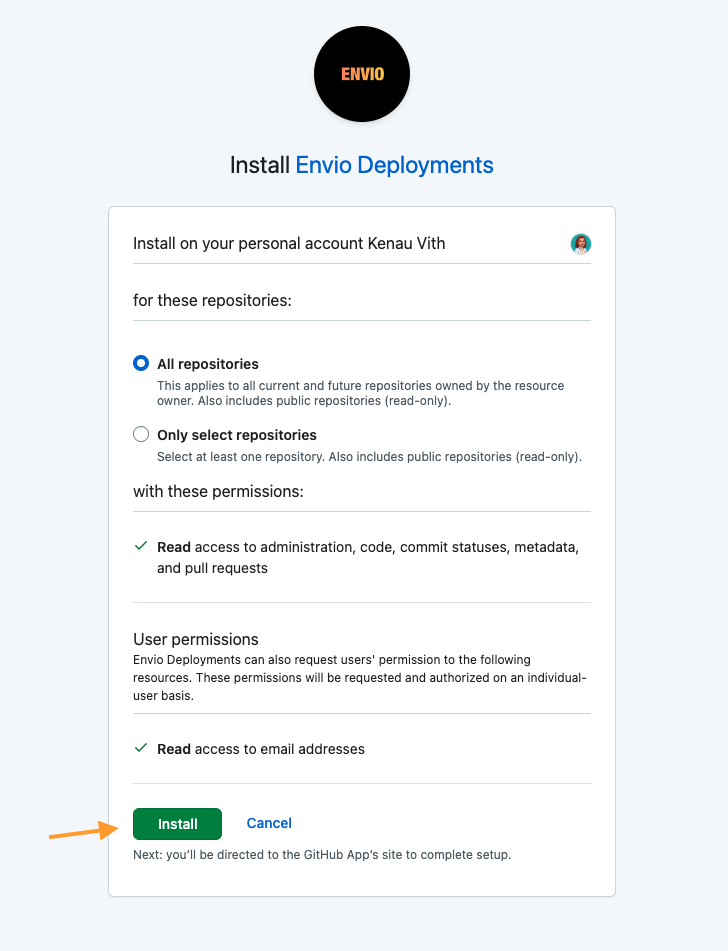
- Install the Envio Deployments GitHub App: Grant access to the repositories you want to deploy
Configure Your Indexer
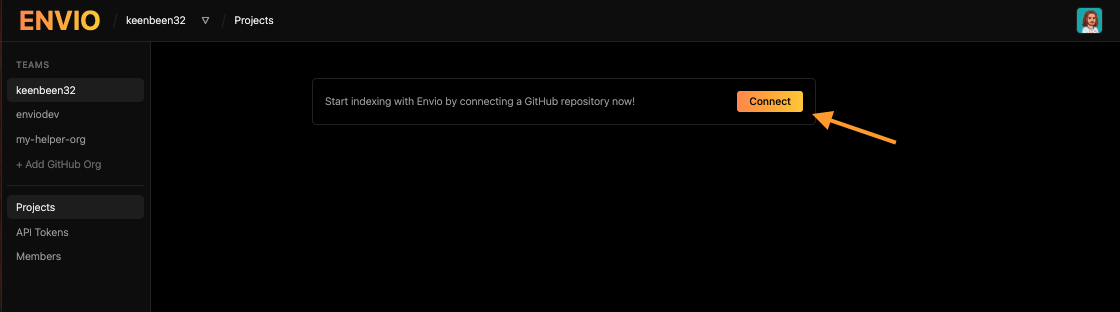
- Connect a Repo: Select the repository containing your indexer code
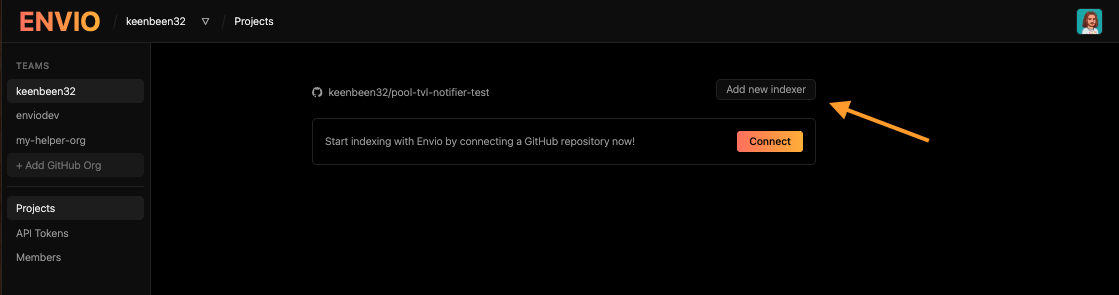
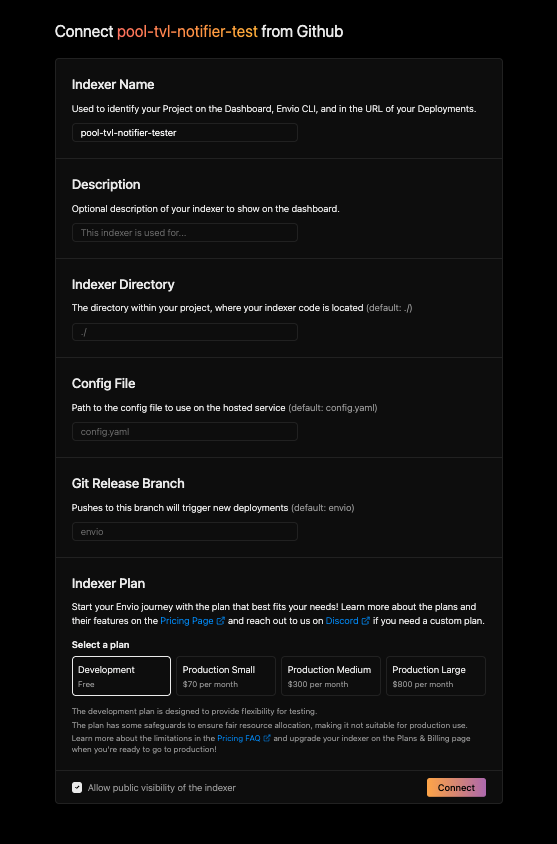
- Add the Indexer: Click "Add Indexer" and configure your indexer
- Configure Deployment Settings:
- Specify the config file location
- Set the root directory (important for monorepos)
- Choose the deployment branch
You can deploy multiple indexers from a single repository by configuring them with different config file paths, root directories, and/or deployment branches.
If you're working in a monorepo, ensure all your imports are contained within your indexer directory to avoid deployment issues.
Deploy Your Code
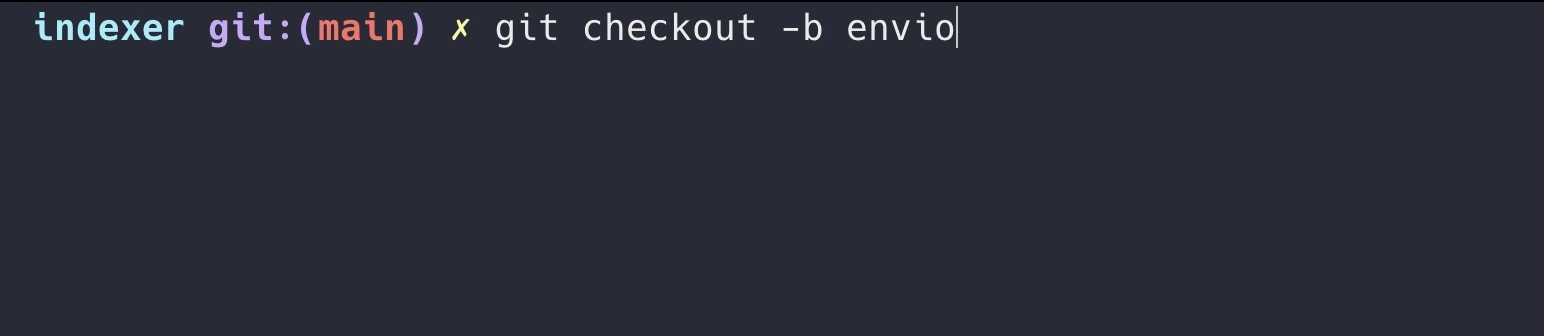
- Create a Deployment Branch: Set up the branch you specified during configuration
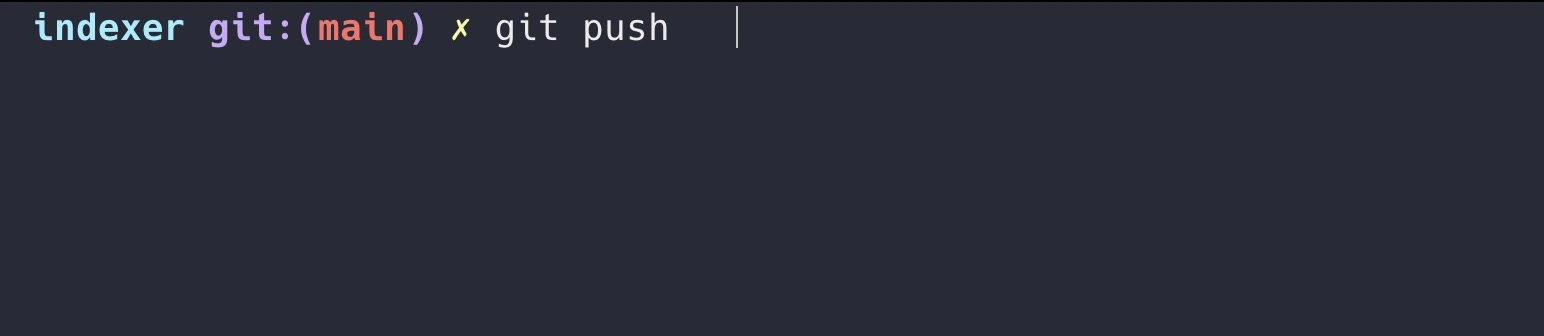
- Deploy via Git: Push your code to the deployment branch
- Monitor Deployment: Track the progress of your deployment in the Envio dashboard
Manage Your Deployment
- Version Management: Once deployed, you can:
- View detailed logs
- Switch between different deployed versions
- Rollback to previous versions if needed
Updating Your Deployment
After your initial deployment, you can update your indexer by pushing new commits to the deployment branch. Each push creates a new deployment version.
What happens on each push
When you push to your deployment branch, Envio Cloud will:
- Build your updated indexer code
- Start a new deployment that re-indexes from the start block
- Keep your previous deployment running and serving queries until the new one is fully synced
This means there is no downtime during updates — your existing deployment continues serving data while the new one catches up.
When re-indexing is required
A full re-index from the start block happens on every new deployment. This includes changes to:
- Event handler logic
- Schema (
schema.graphql) - Configuration (
config.yaml) - ABIs or contract addresses
Use the Effects API cache to speed up re-indexing by caching expensive external calls (like eth_call results) across deployments. This is available on paid plans.
Adding a new chain to your indexer
To add a new chain, update your config.yaml with the new network configuration and push to the deployment branch. The new deployment will index all configured chains, including the new one.
Your previous deployment continues serving data for the existing chains while the new deployment syncs.
Rolling back to a previous version
If a new deployment introduces issues, you can switch back to a previous version from the Envio Cloud dashboard. Navigate to your indexer and select the version you want to activate.
Monitoring
Once your indexer is deployed, you can monitor its health, performance, and progress using several built-in tools including the dashboard, logs, and alerts.
For detailed information about monitoring your deployments, see our Monitoring Guide.
Continuous Deployment Best Practices and Configuration
For a robust deployment workflow, we recommend:
- Protected Branches: Set up branch protection rules for your deployment branch
- Pull Request Workflow: Instead of pushing directly to the deployment branch, use pull requests from feature branches
- CI Integration: Add tests to your CI pipeline to validate indexer functionality before merging to the deployment branch
Continuous Configuration
After deploying your indexer, you can manage its configuration through the Settings tab in the Envio Cloud dashboard:
General Tab
The General tab provides core configuration options:
- Config File Path: Update the location of your indexer's configuration file
- Deployment Branch: Change which Git branch triggers deployments
- Root Directory: Modify the root directory for your indexer (useful for monorepos)
- Delete Indexer: Permanently remove the indexer and all its deployments
Deleting an indexer is permanent and will remove all associated deployments and data. This action cannot be undone.
Environment Variables Tab
Configure environment-specific variables for your indexer:
- Add custom environment variables with the
ENVIO_prefix - Environment variables are securely stored and injected into your indexer at runtime
- Useful for API keys, configuration values, and other deployment-specific settings
Use environment variables for sensitive data rather than hardcoding values in your repository. Remember to prefix all variables with ENVIO_.
Plans & Billing Tab
Manage your indexer's pricing plan and billing:
- Select from available pricing plans
- Upgrade your plan to suit your needs
- View current plan features and limits
For detailed pricing information, see our Pricing & Billing page.
Alerts Tab
Configure monitoring and notification preferences:
- Set up notification channels (Discord, Slack, Telegram, Email)
- Choose which alert types to receive (Production Endpoint Down, Indexer Stopped Processing, etc.)
- Configure deployment notifications (Historical Sync Complete)
For complete alert configuration details, see our Features page.
Alert configuration is available for indexers deployed with version 2.24.0 or higher on paid production plans.
Visual Reference Guide
The following screenshots show each step of the deployment process:
Step 1: Select Organization
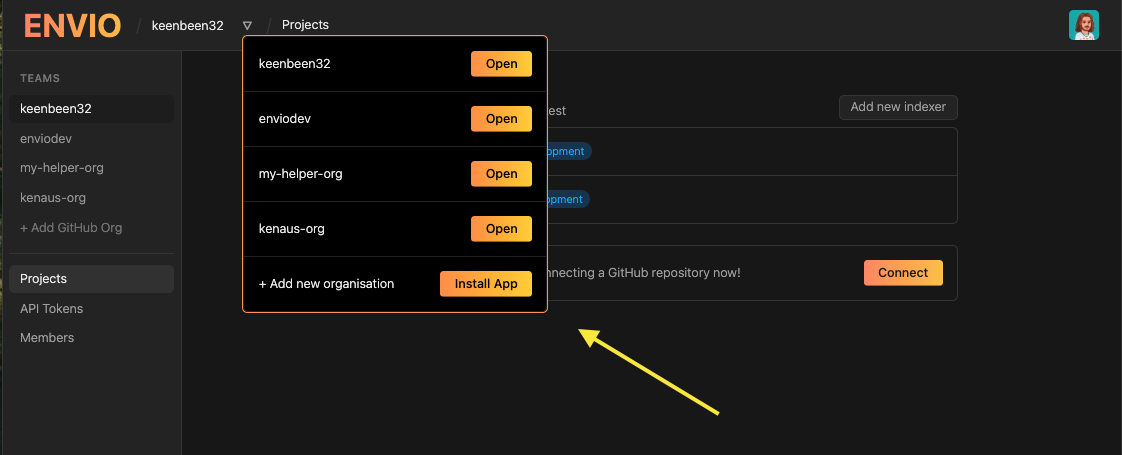
Step 2: Install GitHub App
Step 3: Connect a Repo
Step 4: Add the Indexer
Step 5: Configure Deployment Settings
Step 6: Create a Deployment Branch
Step 7: Deploy via Git
Step 8: Indexer Deployed
Once deployment completes, your indexer should be live and you should see the overview dashboard below. Full monitoring details are available in our Monitoring Guide.
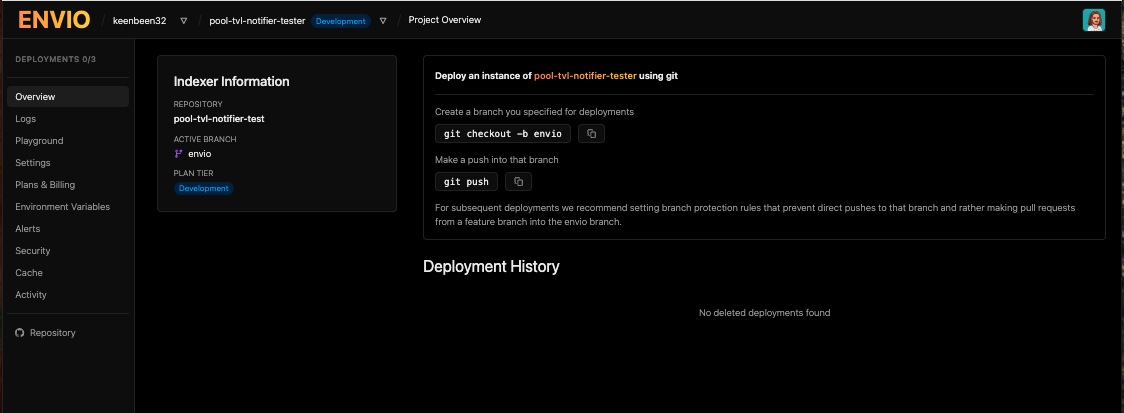
Step 9: Manage Indexer Configuration
Manage indexer configurations and deployments using the sidebar navigation on the left.

Related Documentation
- Features - Learn about all available Envio Cloud features
- Envio Cloud CLI - Deploy and manage indexers from the command line
- Pricing & Billing - Compare plans and see feature availability
- Overview - Introduction to Envio Cloud
- Self-Hosting - Run your indexer on your own infrastructure