Indexing Sway Farm on the Fuel Network
HyperIndex supports any EVM-compatible blockchain and the Fuel Network.
Blockchain indexers are vital to the success of any dApp. In this tutorial, we will create an Envio indexer for the Fuel dApp Sway Farm step by step.
Sway Farm is a simple farming game and for the sake of a real-world example, let's create the indexer for a leaderboard of all farmers 🧑🌾

About Fuel
Fuel is an operating system purpose-built for Ethereum rollups. Fuel's unique architecture allows rollups to solve for PSI (parallelization, state minimized execution, interoperability). Powered by the FuelVM, Fuel aims to expand Ethereum's capability set without compromising security or decentralization.
Prerequisites
Environment tooling
- Node.js (v22 or newer recommended)
- pnpm (v8 or newer)
- Docker Desktop (required to run the Envio indexer locally)
Note: Docker is specifically required to run your blockchain indexer locally. You can skip Docker installation if you plan only to use Envio's hosted service.
Initialize the project
Now that you have installed the prerequisite packages let's begin the practical steps of setting up the indexer.
Open your terminal in an empty directory and initialize a new indexer by running the command:
pnpx envio init
In the following prompt, choose the directory where you want to set up your project. The default is the current directory, but in the tutorial, I'll use the indexer name:
? Specify a folder name (ENTER to skip): sway-farm-indexer
Then, choose a language of your choice for the event handlers. TypeScript is the most popular one, so we'll stick with it:
? Which language would you like to use?
  JavaScript
> TypeScript
  ReScript
[↑↓ to move, enter to select, type to filter]
Next, we have the new prompt for a blockchain ecosystem. Previously Envio supported only EVM, but now it's possible to choose between Evm, Fuel and other VMs in the future:
? Choose blockchain ecosystem
  Evm
> Fuel
[↑↓ to move, enter to select, type to filter]
In the following prompt, you can choose an initialization option. There's a Greeter template for Fuel, which is an excellent way to learn more about HyperIndex. But since we have an existing contract, the Contract Import option is the best way to create an indexer:
? Choose an initialization option
  Template
> Contract Import
[↑↓ to move, enter to select, type to filter]
A separate Tutorial page provides more details about the
Greetertemplate.
Next it'll ask us for an ABI file. You can find it in the ./out/debug directory after building your Sway contract with forc build:
? What is the path to your json abi file? ./sway-farm/contract/out/debug/contract-abi.json
After the ABI file is provided, Envio parses all possible events you can use for indexing:
? Which events would you like to index?
> [x] NewPlayer
  [x] PlantSeed
  [x] SellItem
  [x] InvalidError
  [x] Harvest
  [x] BuySeeds
  [x] LevelUp
[↑↓ to move, space to select one, → to all, ← to none, type to filter]
Let's select the events we want to index. I opened the code of the contract file and realized that for a leaderboard we need only events which update player information. Hence, I left only NewPlayer, LevelUp, and SellItem selected in the list. We'd want to index more events in real life, but this is enough for the tutorial.
? Which events would you like to index?
> [x] NewPlayer
  [ ] PlantSeed
  [x] SellItem
  [ ] InvalidError
  [ ] Harvest
  [ ] BuySeeds
  [x] LevelUp
[↑↓ to move, space to select one, → to all, ← to none, type to filter]
📖 For the tutorial we only need to index
LOG_DATAreceipts, but you can also indexMint,Burn,TransferandCallreceipts. Read more about Supported Event Types.
Just a few simple questions left. Let's call our contract SwayFarm:
? What is the name of this contract? SwayFarm
Set an address for the deployed contract:
? What is the address of the contract? 0xf5b08689ada97df7fd2fbd67bee7dea6d219f117c1dc9345245da16fe4e99111
[Use the proxy address if your abi is a proxy implementation]
Finish the initialization process:
? Would you like to add another contract?
> I'm finished
  Add a new address for same contract on same network
  Add a new contract (with a different ABI)
[Current contract: SwayFarm, on network: Fuel]
If you see the following line, it means we are already halfway through 🙌
Please run `cd sway-farm-indexer` to run the rest of the envio commands
Let's open the indexer in an IDE and start adjusting it for our farm 🍅
Walk through initialized indexer
At this point, we should already have a working indexer. You can start it by running pnpm dev, which we cover in more detail later in the tutorial.
Everything is configured by modifying the 3 files below. Let's walk through each of them.
(* depending on the language chosen for the indexer)
config.yaml
The config.yaml outlines the specifications for the indexer, including details such as network and contract specifications and the event information to be used in the indexing process.
name: sway-farm-indexer
ecosystem: fuel
networks:
  - id: 0
    start_block: 0
    contracts:
      - name: SwayFarm
        address:
          - 0xf5b08689ada97df7fd2fbd67bee7dea6d219f117c1dc9345245da16fe4e99111
        abi_file_path: abis/swayfarm-abi.json
        handler: src/EventHandlers.ts
        events:
          - name: SellItem
            logId: "11192939610819626128"
          - name: LevelUp
            logId: "9956391856148830557"
          - name: NewPlayer
            logId: "169340015036328252"
In the tutorial, we don't need to adjust it in any way. But later you can modify the file and add more events for indexing.
As a nice to have, you can use a Sway struct name without specifying a logId, like this:
- name: SellItem
- name: LevelUp
- name: NewPlayer
schema.graphql
The schema.graphql file serves as a representation of your application's data model. It defines entity types that directly correspond to database tables, and the event handlers you create are responsible for creating and updating records within those tables. Additionally, the GraphQL API is automatically generated based on the entity types specified in the schema.graphql file, to allow access to the indexed data.
🧠 A separate Guide page provides more details about the
schema.graphqlfile.
For the leaderboard, we need only one entity representing the player. Let's create it:
type Player {
  id: ID!
  farmingSkill: BigInt!
  totalValueSold: BigInt!
}
We will use the user address as an ID. The fields farmingSkill and totalValueSold are u64 in Sway, so to safely map them to JavaScript value, we'll use BigInt.
EventHandlers.ts
The event handlers generated by contract import are quite simple and only add an entity to a DB when a related event is indexed.
/*
 * Please refer to https://docs.envio.dev for a thorough guide on all Envio indexer features
 */
import { SwayFarmContract, SwayFarm_SellItemEntity } from "generated";

SwayFarmContract.SellItem.handler(async ({ event, context }) => {
  const entity: SwayFarm_SellItemEntity = {
    id: `${event.chainId}_${event.block.height}_${event.logIndex}`,
  };

  context.SwayFarm_SellItem.set(entity);
});
Let's modify the handlers to update the Player entity instead. But before we start, we need to run pnpm codegen to generate utility code and types for the Player entity we've added.
pnpm codegen
It's time for a little bit of coding. The indexer is very simple; it requires us only to pass event data to an entity.
import { SwayFarmContract } from "generated";

/**
Registers a handler that processes NewPlayer event
on the SwayFarm contract and stores the players in the DB
*/
SwayFarmContract.NewPlayer.handler(async ({ event, context }) => {
  // Set the Player entity in the DB with the intial values
  context.Player.set({
    // The address in Sway is a union type of user Address and ContractID. Envio supports most of the Sway types, and the address value was decoded as a discriminated union 100% typesafe
    id: event.params.address.payload.bits,
    // Initial values taken from the contract logic
    farmingSkill: 1n,
    totalValueSold: 0n,
  });
});

SwayFarmContract.LevelUp.handler(async ({ event, context }) => {
  const playerInfo = event.params.player_info;
  context.Player.set({
    id: event.params.address.payload.bits,
    farmingSkill: playerInfo.farming_skill,
    totalValueSold: playerInfo.total_value_sold,
  });
});

SwayFarmContract.SellItem.handler(async ({ event, context }) => {
  const playerInfo = event.params.player_info;
  context.Player.set({
    id: event.params.address.payload.bits,
    farmingSkill: playerInfo.farming_skill,
    totalValueSold: playerInfo.total_value_sold,
  });
});
Without overengineering, simply set the player data into the database. What's nice is that whenever your ABI or entities in graphql.schema change, Envio regenerates types and shows the compilation error.
🧠 You can find the indexer repo created during the tutorial on GitHub.
Starting the Indexer
📢 Make sure you have docker open
The following commands will start the docker and create databases for indexed data. Make sure to re-run pnpm dev if you've made some changes.
pnpm dev

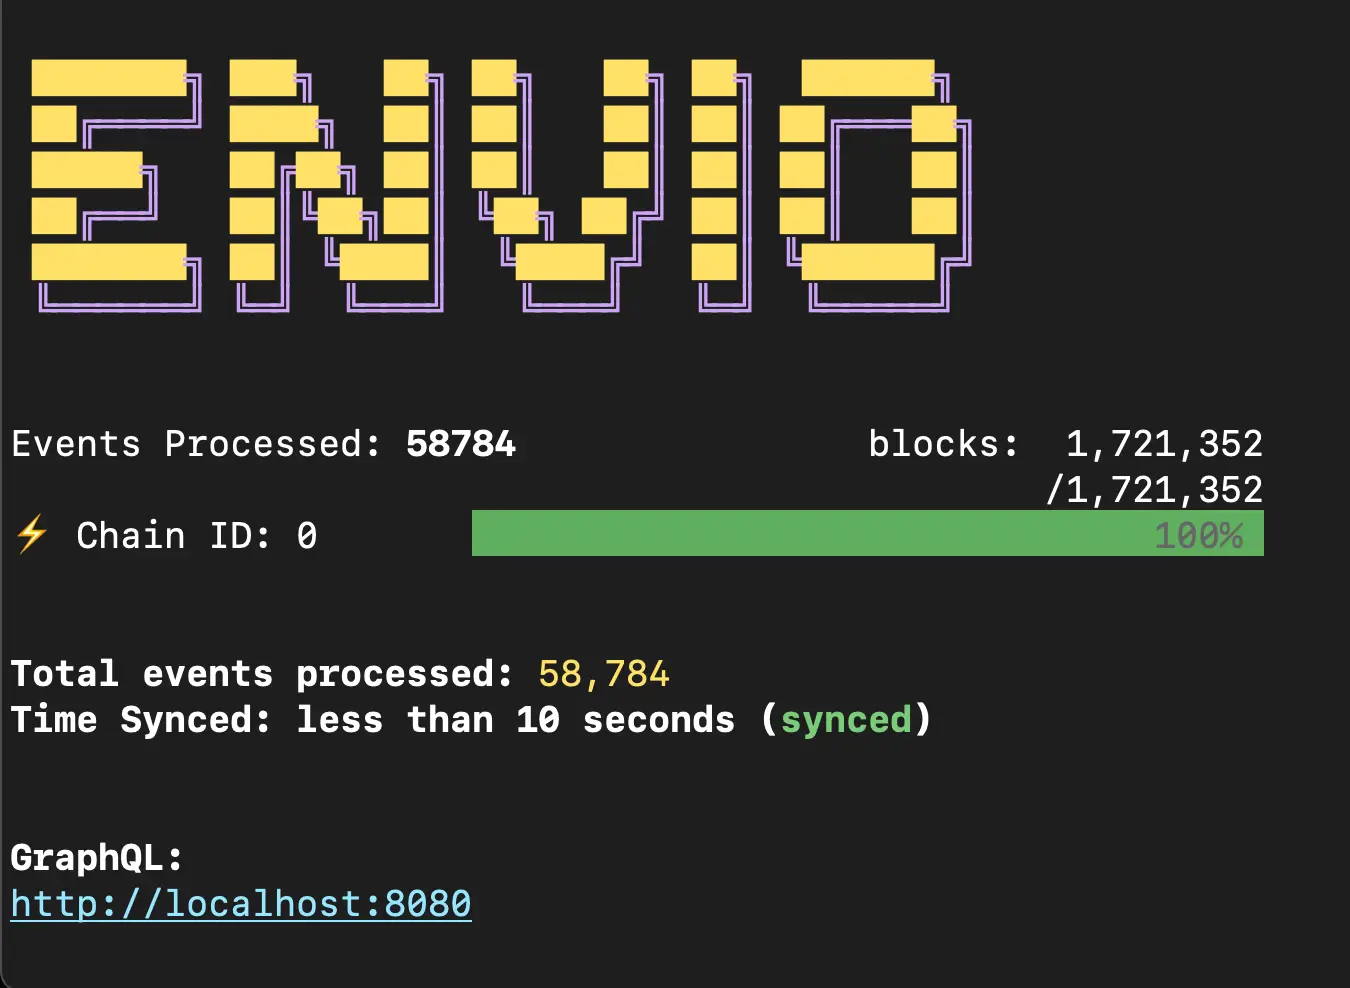
Nice, we indexed 1,721,352 blocks containing 58,784 events in 10 seconds, and they continue coming in.
View the indexed results
Let's check indexed players on the local Hasura server.
open http://localhost:8080
The Hasura admin-secret / password is testing, and the tables can be viewed in the data tab or queried from the playground.

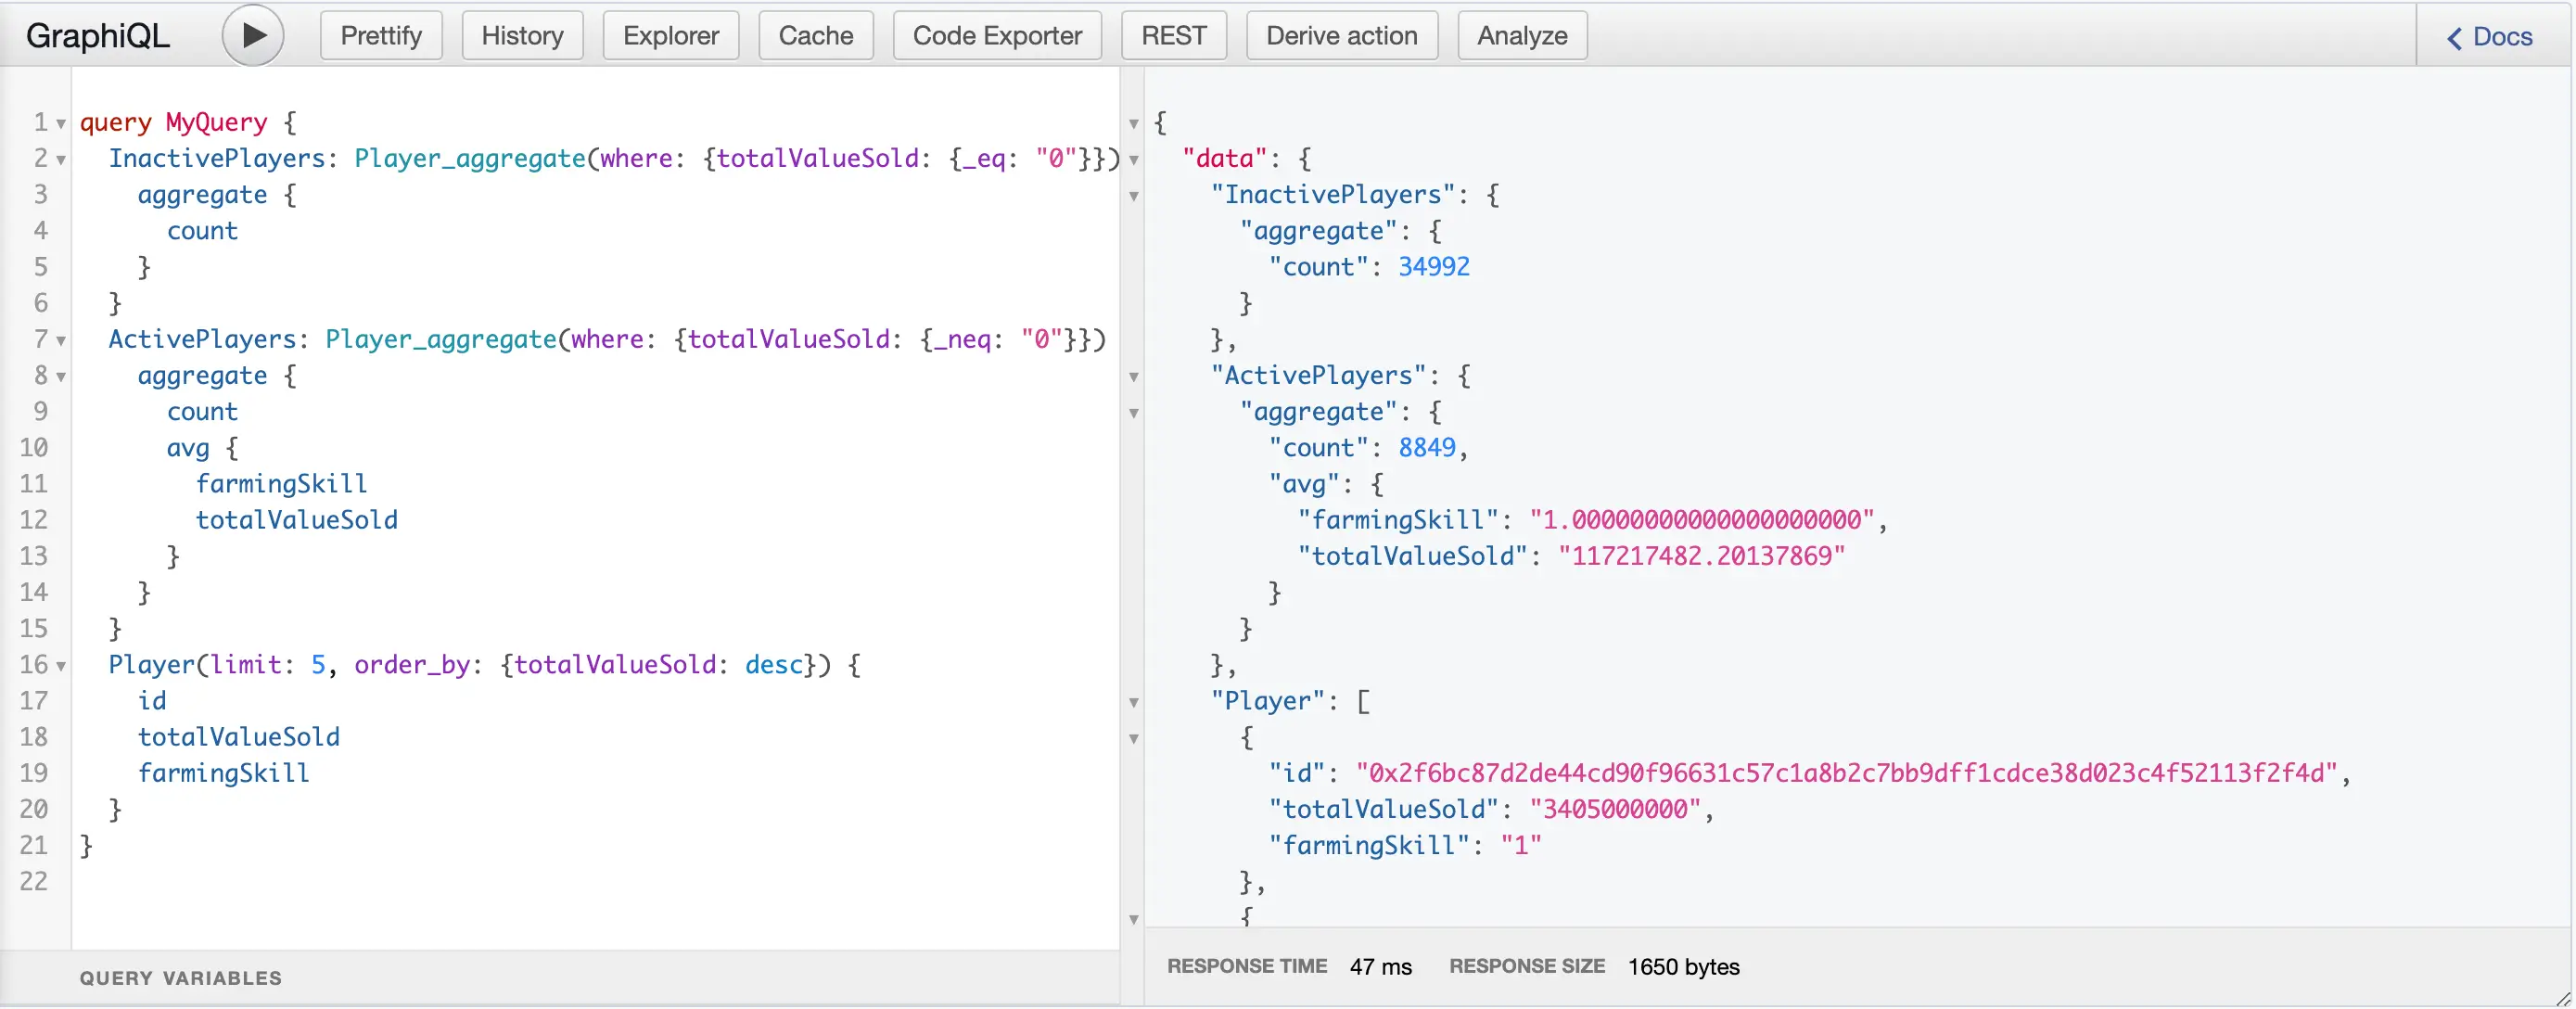
Now, we can easily get the top 5 players, the number of inactive and active players, and the average sold value. What's left is a nice UI for the Sway Farm leaderboard, but that's not the tutorial's topic.
🧠 A separate Guide page provides more details about navigating Hasura.
Deploy the indexer onto the hosted service
Once you have verified that the indexer is working for your contracts, then you are ready to deploy the indexer onto our hosted service.
Deploying an indexer onto the hosted service allows you to extract information via graphQL queries into your front-end or some back-end application.
Navigate to the hosted service to start deploying your indexer and refer to this documentation for more information on deploying your indexer.
What next?
Once you have successfully finished the tutorial, you are ready to become a blockchain indexing wizard!
Join our Discord channel to make sure you catch all new releases.